
Shed Site Preparation
Site Preparation Guidelines for Barns & Run-in Sheds With Overhang / Modular Barns
Your structure will last longer with a properly prepared site. Shedrow barns and run-in sheds with overhangs or modular, center aisle barns should follow these guidelines to keep all parts of the building level and functioning properly.
Features
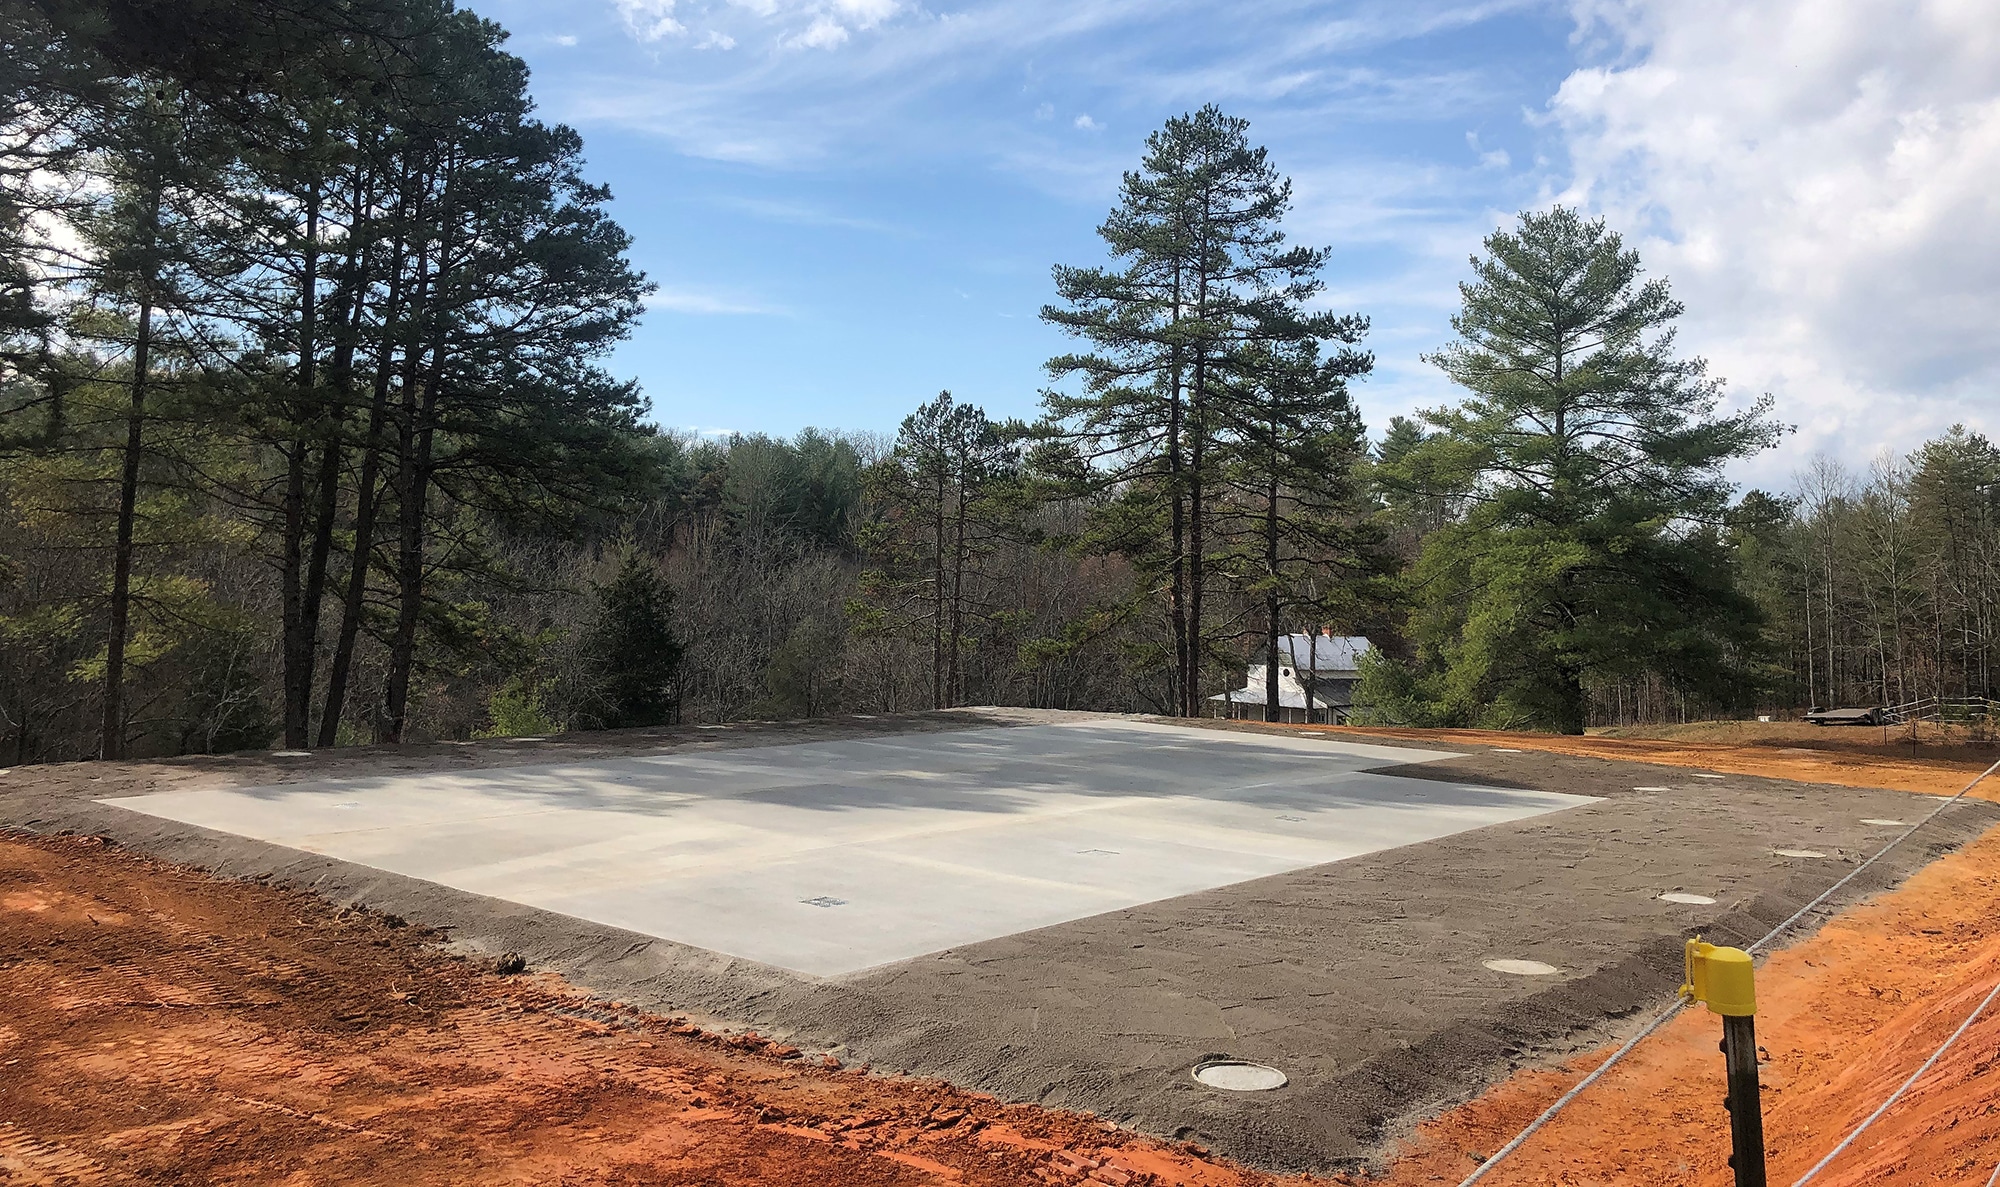
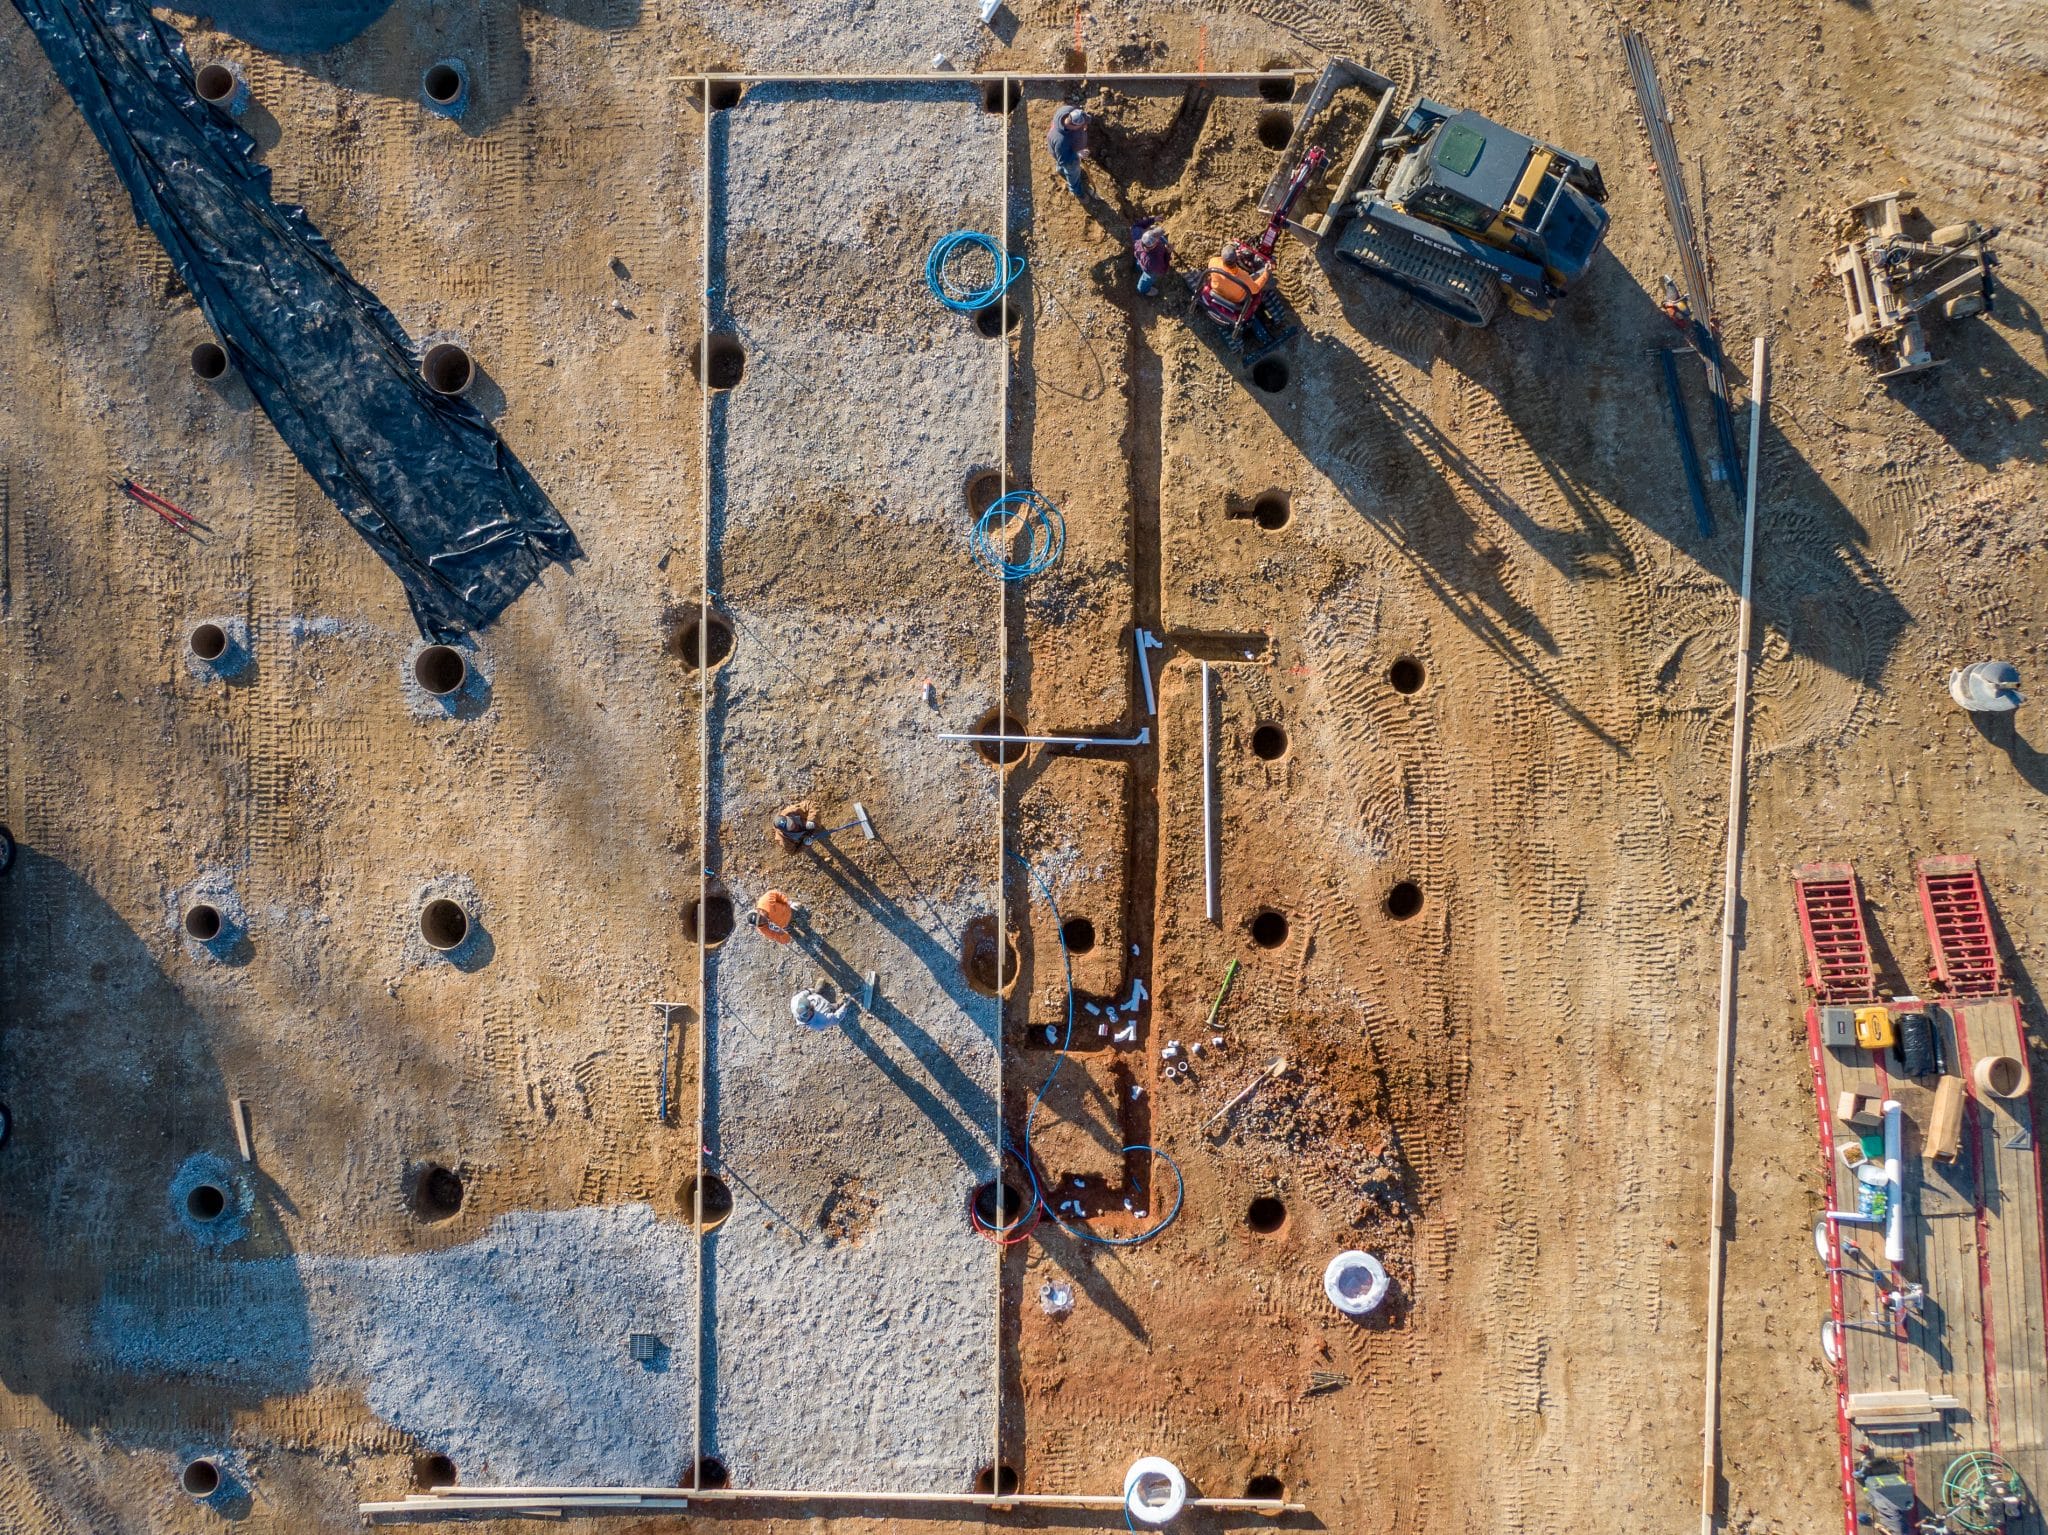
Recommend concrete pillars – 18″ in diameter, 3’ – 4’ deep (below the frost line) and 3” – 4” above ground level. This will prevent the building from settling unevenly due to ground freezing/thawing cycles which can change the ground level over time. Stone Dust should be used to fill in to within 1/4″ of the top of the sonotube. We will give you a footer diagram showing exact measurements and placement for your specific barn. A 1/4″ Steel L-Bracket will be used to anchor the building onto the concrete pillars.
NOTE: Land will need to be cleared and leveled by an excavator prior to pier installation. Final grading will also need to be done after the barn is delivered and set up.
- If you desire cement in the center aisle or under the overhang, that can be poured after the barn is delivered.
- If you desire a full concrete pad, we will provide a foundation plan for your site contractor to work with.
Site Preparation For Footers
ON ANY HORSE BARN/RUN-IN SHED WITH AN 6′, 8′, 10′, 12′ OVERHANG or Center Aisle Horse Barn:
- Recommend concrete "pillars" - 18" diameter, 3-4' deep and 3-4" above ground level. Backfill with stone dust to ¼" below top of pillar.
- This will prevent the building from "settling" unevenly due to ground freezing/thawing cycles which can change the ground level over time.
- We recommend these pillars be placed at the building corners and every 10 - 12 feet under the foundation, around the building's perimeter.
- Area around the barn and under the overhang, should then be back filled with stone dust to pillar height
- We would then use a ¼" steel hurricane bracket bolted to the concrete footer with concrete screws and lag bolted to the 6x6 that makes up the base of the building.
- Anchoring your building will help stabilize it against side-to-side shifting or vertical lifting in the event of high winds.
- Ultimately, it is your responsibility to check with all municipal agencies and obtain all necessary permits and inspections for contraction site preparation.