After careful consideration, we have decided we will no longer be including playsets in the Horizon Structures product line. We appreciate your understanding and thank you for your support. If you have any questions or need assistance, please feel free to reach out to us on 888-447-4337 or sales@horizonstructures.com.
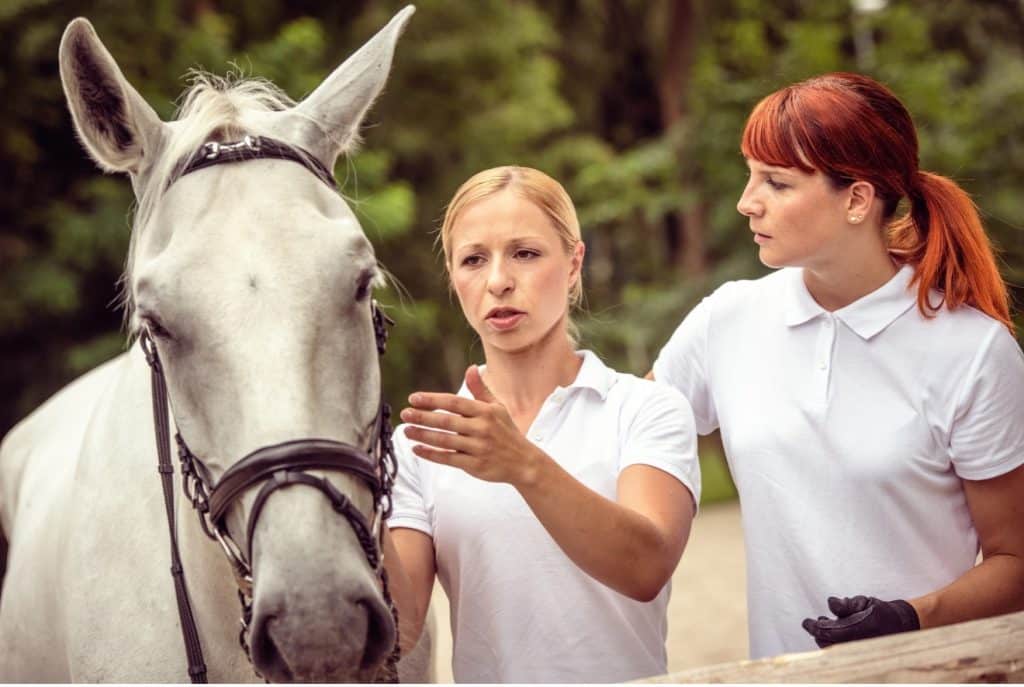
The biggest toy in the garden is the playset. It is the center of the universe when it comes to developing a playground and figuring out just what to buy and where it fits is an important part of the playground project.
You may not be building a city or community playground, but there’s much that can be learned from understanding a 101 course on playground design. It’s not hard to make your backyard or community playground the best on the block by following a few simple rules.
Creation of a neighborhood playground will likely require review and inspection by a Certified Playground Safety Inspection officer {CPSI}. You can locate one here. It is prudent to begin liaison with a CPSI in the earliest stages of a community playground project to avoid costly mistakes and gain some savvy advice, including ideas and options on how to save money on the cost of the equipment and supplies needed.
For the homeowner a CPSI is not necessary, but there is plenty of good press the National Recreations and Parks Association [NRPA} provides that can help engage the parent that is keen to build a functional and importantly safe playground, in their backyard. The 12-Point Playground Safety Checklist published by the NRPA is a must read. It offers parents and caregivers a great resource of pertinent information that can be applied to choosing a safe playground for their children inside and outside of the backyard. It covers topics such as trip hazards, types of surfaces that are acceptable, and common issues as well as more technical aspects such as UV degradation of equipment and surfaces.
Ruling Factors
The budget for your playground project does not need to be set in stone as thankfully it is easy to add equipment to a design piecemeal as needs and finances dictate. However, you do need to identify a starting point, and this will be affected not just by how much money you must put into the project but also how much space you have to play with to accommodate playsets and equipment.
Siting is necessarily an important part of the process. Ideally the site will be level and need minimal preparation by heavy equipment. But where this is not the case aggregate may need to be brought in and other surface material cover for safety underneath the playset will need to be installed on top of a compacted site.
When considering the site think about the dimension of the entire play space as well as the topography and drainage, but don’t overlook the need for access for equipment to modify or prepare the site.
Also consider whether the site will be in the sun all day, as a sunny location may require provision of shade for protection from the harmful sun’s rays and to minimize risks of children becoming dehydrated and/or suffering heat exhaustion.
Bear in mind that every type of playground equipment or structure has a need for safe use zones. This means that all products must be safely spaced from each other and from other objects such as walls and trees.
Security for the children is an essential component of their safety. While we often think about what the ground cover will be under a swing set, we might overlook the need for a playground area to be fenced to keep both the kids in and others out. Figure in the budget to allow for fencing. Site selection that offers safety away from busy roads but within view of other buildings for supervisory purposes is a good idea.
What To Buy
There is a myriad of options from which to choose when it comes to playsets and outdoor equipment. The first consideration should be the age range of the children that will use the playground. Building up and out from one point as a young family grows up is always a good way to minimize the initial spend. Bear in mind there is an active secondhand marketplace for playsets and equipment that has ‘aged out’ of use so consider whether you want certain pieces to be portable rather than permanent.
Structures are generally grouped into age group categories. For example, 0-2 years, 2-5 years, 5-12 years and then there are playsets designed to address multiple ages from 2-12 years.
The main choice you will encounter will be between vinyl or wood products.
Eco-friendly wood is a replenishable natural resource and choosing a manufacturer that sources their wood from a sustainable operation is an option. Locating a manufacturer that builds playsets in the U.S.A. from U.S.A. components is also a patriotic way to buy.
The downside is that wood is higher maintenance in general than vinyl, and it can splinter and rot over time, despite being treated with an environmentally friendly nontoxic preservative.
Woods more durable cousin, vinyl on the other hand, can be a super low maintenance option that many homeowners appreciate, as there will be no need for repainting and re-staining. Consider selecting a vinyl playset from a manufacturer that uses recyclable plastics for an eco-friendly option.
Choose a good quality vinyl product that is made with the color manufactured throughout the entire product, not just a superficial coating.
Color is an important part of the aesthetics of design, but so are the aspects of use regarding how a playground will promote a child’s learning and develop fitness and social skills while at play.
Each component of a playset can fulfil more than one benefit. For example, did you know that swinging can offer a calming effect on a child as well as provide a physical activity.
“Swinging is not only a super fun outdoor activity (that can even help develop a child’s sixth sense), but it also allows a child’s body to be in constant motion while ALSO sitting (mostly) still at the same time AND giving his brain a chance to rest and reflect. Win. Win. Win.” Amanda Webster
The different styles and designs of playsets lend themselves to different imaginative adventures for the kids, but the view of the playset and playground from the house is also something to consider.
Modern or traditional, ensure the playset and all components are properly installed following manufacturer’s instructions. Volunteer help to assemble and build is often available from neighbors and family, friends if needed, but don’t be shy to involve the kids themselves in the project where it is safe to do so.
Consider the needs of adults in the design process too. It is a good idea to strategically place close by, a shady seating area, picnic space or other conversational spot. This will encourage parents and grandparents, and other family members or friends to interact with each other and with the children while at play.
How To Buy
When looking at price comparisons between manufacturers it is all too easy to not compare ‘apples to apples”. In fact, some manufacturers go out of their way to make such comparisons difficult.
Check the grade and quality of each component, along with how any hardware features are coated or protected from wear. This should include bolts and fixtures that hold the structure together. All points of connection should offer longevity and be safely rounded or capped, to protect the users of the playset. The cheapest option is usually not the best option.
Many manufacturers have a knowledgeable staff on hand that can offer advice on design options as well as means to mitigate expenses.
Be aware that many manufacturers will offer a quantity discount if you purchase more than one type of unit from their line-up. Ask about funding options, warranties and always check references and reviews on the playsets on offer.
Certain manufacturers offer impressive 50-year warranties on their products, but make sure that the company you collaborate with on the purchase has a proven reputation for standing behind their products.
A ‘to the penny’ quote, including any delivery and set up charges should be provided in writing. Don’t part with any money on deposits without written terms and an executed agreement, particularly on a large multiple purchase that might extend over a timeline (that should also be detailed).
Availability and delivery timelines should also be considered in your selection process. A great price is not much help if the product is not readily available.
Expect Some Maintenance
While a backyard playground does not require regular safety inspections the way a community project would do, it is still important to conduct safety checks periodically of the structures and to maintain the equipment.
Ground covering materials may need to be replenished periodically due to environmental break down or displacement. Some examples: wood chips will disintegrate over time; sand has a way of migrating away from the play area either in drying winds or in the shoes of the little persons using the playground.
In conclusion, designing and building your backyard playground should be a fun project and one that can involve the whole family. Following a few simple protocols will help ensure your money is well-spent.
From NBC to CreateTV, Lisa Steele of the famed FreshEggsDaily.com is no stranger to showcasing life on the farm. Today she is celebrating 12 years and 55 million website visits Author, 5th generation chicken keeper and coop to kitchen cook, Lisa is Maine’s answer to a cross between Martha Stewart and Jeremy Clarkson.
Her latest TV series, Welcome to my Farm, is currently in its 2nd series and the glamorous life of hosting a TV show is not all it is cracked up to be, as Lisa explains in this heart-to-heart interview shared here. Take a gander! (Yes, all puns intended, just couldn’t help myself.)
Q: What is the very best part of making your TV show from your own perspective?
Lisa: I have a lot of fun coming up with episode themes/segments, but what I love most about doing the show is the same thing that I love about writing books. They are both content that has a lifespan longer than being on the front page of a social media account. The shows are archived streaming online even after they finish airing on television. Hopefully years from now, people can still be enjoying them, unlike a Facebook post.
Q: Can you give us an idea of how a regular filming day goes? (time/takes/how many crew, etc, who are on the crew – names/positions) and a few photos of any of them if possible!
Lisa: An episode normally takes two to three full days of filming. Especially if we are visiting another location other than my farm. We have increased the crew for season two which I’m excited about. For the first season we had just a director and two cameras. That meant that we had to do multiple takes in order to get say an overhead view of a cooking segment for example. It also meant that in addition to being responsible for assembling all the props and my wardrobe for each segment and doing my hair and makeup, I also had to feed everyone lunch, refill coffee cups or water bottles…and was also the person who would run back to the house if we forgot something. It was a lot.
For season two, we have a director, three cameras, two set assistants, a still photographer, a drone operator, craft services to feed everyone and a hair/makeup assistant. The extra crew will hopefully bring the show to a whole new level – and at the very least allows me to focus solely on the show content and my lines!
For season one, for the most part we shot each episode in chronological order, so we would usually start out with the visit to the locale, whether it be a strawberry farm or a lobster pound, then come back to my house and shoot the chicken or garden segment outside. Then the second day we would shoot the kitchen segment.
For season two, we have switched things up and shot three episodes of kitchen segments over the course of 2 days. It’s much more efficient to do it that way because they only have to set up the lights and sound and props, etc. once. Most of the time shooting ends up being the set-up. Lots of standing around waiting for everything to be ready. I can see why lots of movie stars take up knitting!
Q: What is the funniest thing that has ever happened on your show during the filing process? Unexpected? Animal issues with non-compliance? Accidental happy notes?
Lisa: Interestingly enough, the chickens are extremely easy to work with. They are very cooperative, especially where treats are involved! It’s usually me who messes up and doesn’t hit my mark or forgets what I’m supposed to be saying! There are always mishaps in the kitchen too. Flour going everywhere, or a cake ending up being under baked. But it’s amazing how much can be fixed in the editing room!
I think the funniest thing that has happened so far on set is when a huge raven flew into the chicken run while I had the door propped open and hopped up on the swing that I have set up for the chickens. The raven sat there swinging back and forth and terrified the chickens.
Q: People generally belief that being the ‘star’ on a TV show is an easy and glam job. What would you say is the biggest misconception about being the lead talent on a TV show? And how do you deal with it?
Lisa: I myself was actually surprised at how exhausting it is to “act” in a TV show. It may look glamorous but doing a scene over and over gets tiring really quickly. Even a short 30 second scene might take an hour or two to shoot. Let’s just say I sleep very well after a day of shooting!
I also find it hard to memorize lines! I do much better when they just let me ramble and then piece together a coherent segment during the edit process. For the new season we do also have a teleprompter which has been really helpful to keep me on track and remembering specific points I want to bring up during each segment.
Q: Do you get recognized when you are out and about because of your TV fame?
Lisa: I do get recognized! The show was on NBC here in Maine for two years prior to moving to public television/CreateTV and so when I’m out to dinner with my husband or at the feed store especially, I get recognized pretty often, which is really cool. Especially since Covid put a stop to in-person book signings and speaking engagements, it’s nice to be able to interact with people I meet as I go about my errands.
Q: What is the biggest misconception in your opinion that folks have about country life?
Lisa: I think people believe that you need a lot of land to raise animals or grow your own food. And I don’t think they realize how relatively inexpensive land and a farmhouse can be out in rural areas. We pay less taxes on 300 acres here in Maine than my mom does on a house half the size on barely an acre in Massachusetts. I wish more people would research areas they might like to move to and look at some of the farm listings. They are much more affordable than they think. And for those who want to continue living in a suburban or slightly rural area, raising half a dozen chickens and growing an herb garden for example doesn’t take much space at all.
And people should know that you don’t have to do it all. If you don’t want to raise chickens, don’t raise chickens, instead find a neighbor who does and buy eggs from them. Don’t like canning? Fine, you don’t need to do that either. You can pick and choose the things that you want to do. Barter or trade or buy local for the other things. Social media can give the impression that these “homesteaders” are raising every type of livestock under the sun, making milk and cheese, canning, and preserving every vegetable known to man. Just pick the things you enjoy doing or are good at. Every little bit makes you more self-sufficient and is good for the planet.
Q: What is the hardest thing about living a homesteading lifestyle?
Lisa: Predators. Definitely predators. Keeping animals safe from predators is something that I battle every day. And anyone who raises livestock, whether it be chickens, sheep, cows, battles. There are predators everywhere and they only have to “win” once for you to lose your entire flock.
Q: What was your work baking or kitchen disaster?
Lisa: Oh, I started young with my kitchen disasters. I was maybe 10 or 11 and working on my Girl Scout baking badge and turned on the oven to preheat it. My mom used to store all her pots and pans in the oven, and many had plastic handles… which all melted. She has never let me live that one down.
Q: What do you love about where you live and would never want to change and why?
Lisa: I was born and grew up in Massachusetts, then went to college in Rhode Island. I want to work on Wall Street after college and lived on Long Island, then after I got married, my husband and I lived in Pensacola, then Norfolk VA where he was stationed in the Navy. But we always knew we wanted to come back to New England. Maine is where we belong. I love the seasons, the gorgeous foliage, and the snow. I love the old-fashioned feeling to many of the smaller towns and the slower pace. I hope that in coming years Maine stays the way it is. Kind of a throwback to how things were in my childhood.
Q: You have several sponsors including Horizon Structures. Could you fill us in on how and when you came to know the HS brand and what you like about it/how the relationship developed into sponsorship?
Lisa: I was immediately drawn to Horizon Structures when I first started raising chickens, but we weren’t in my forever home, so I built my original coop for our first 6 chickens. It wasn’t until we moved to Maine that I got my first “real” coop. I had by then been working with Horizon for several years and I was impressed with the employees, their professionalism, and also had gotten feedback from many of my followers who had HS coops. I loved how many choices HS offered, and how well-built they seemed to be. Since we have bears and coyotes here in Maine, I knew I needed a larger, sturdy, walk-in coop and it was a no-brainer to work with HS to design the coop of my dreams
Q: Can you tell us a bit about the Horizon Structures coop and how you customized it?
Lisa: My HS coop isn’t actually a coop at all. It’s the garden shed that they customized for me by adding roosts and nesting boxes.
They also divided the coop so about 1/3 was a separate section with a door and wire dividing wall where I could store my chicken feed, supplements, first aid supplies, etc. I love that the coop has 4 windows with screens (and protective welded wire) that open and close to control the ventilation and air flow. And there are predator-proof latches on the large double doors (I asked for those so I could get a wheelbarrow inside if I wanted or maybe in the far future use the coop to store a lawn tractor or other equipment) and on the small chicken door.
It was wonderful the way it arrived, but I am known for tweaking everything!
I ended up building new roosts because you know chicken math! The roosts that the coop came with didn’t fit our ever-growing flock eventually! I also installed shiplap inside. It was very easy because I just had to nail it to the studs. I liked that the white made the coop brighter inside and it is far easier to keep clean than I anticipated! I also added shiplap to the wire wall dividing the sleeping area from the storage area to keep the coop bedding, dust, and feathers from getting into the storage area. I also replaced the swinging door between the two areas with a sliding barn door which is much easier to open and close when the coop is full of bedding.
I had a row of nesting boxes installed in the storage area for storage and underneath them I made a sort of nursery where I could keep a broody hen penned up with her chicks to keep them safe from the rest of the flock.
And then of course I installed curtain rods and hung curtains across the windows, nesting boxes and little pop door – because that’s just what I do.
Q: Any coop ‘must haves’ or recommendations for new coop buyers?
Lisa: I would say plan your coop size for the flock you eventually want to have.
Be sure there is plenty of ventilation and that all holes larger than 1/2″ are covered with welded wire. Plan on a nesting box for each 5 or 6 hens, and at least 8″ of roosting bar for each chicken.
Other than that, go wild, have fun with it and choose what appeals to you.
Q: Based on your many years of experience – what is your favorite animal to work with and why? Breed/species or a particular favorite living or passed.
Lisa: We’ve only had geese for about 4 years, but they have quickly become favorites. They are very smart, and since they are larger, less vulnerable to predator attack, at least from the smaller predators. And since geese are actually more like cows or horses than ducks or chickens, they graze all day long. If they could, they would eat grass and weeds as 100% of their diet.
I do supplement them with wheat and oats, sometimes hay in the winter, but as long as there’s grass, they’ll happily eat that which saves alot of the feed bill! The one downside to geese is that they only lay for a few weeks in the spring, not most of the year like chickens and ducks, but their eggs are similar to duck eggs, nice large yolks and higher in fat. And since one goose egg is equivalent to three chicken eggs, so you don’t need too many to make an omelet!
Q: Can you tell us a bit about your family life? And idea of your regular day behind the scenes?
Lisa: My husband retired from the Navy when we moved to Maine 7 years ago, so he takes care of the mowing, snow plowing, car inspections, etc. and he even does the grocery shopping! He’ll run errands also which is nice. That leaves me to concentrate on my business which consists of not only the TV show, but also my blog, social media platform, a chicken supplement product line that I sell on Amazon and Chewy and also my books (7 to date). It’s also nice that he’s home to take care of the animals when I travel. Before Covid, I used to do a fair amount of public speaking at fairs and conferences as well as book signings around the country.
Q: Do you get nervous before taping a show? Are there many edits needed? Are there any things you’d love to do on camera outside of your present role? Types of shows etc.?
Lisa: Oddly enough, while public speaking terrifies me and I have pretty much bowed away from that for the most part, I absolutely love being on TV! It’s like filming a mini movie! I originally got the “TV bug” when P. Allen Smith asked me to appear on a few episodes of his show which also airs on public television. This was years ago, but I never forgot how much I enjoyed that. So, I am thrilled to now have my own show. It’s alot of fun. In a way, I’m playing a character – even though that character is myself!
I would love to do a strictly cooking show some day, but for now I still have more chicken keeping and gardening advice to share – and I have been having a lot of fun exploring the state of Maine right along with my viewers!
Q: The thing about keeping livestock is that it is hard to get away? Do you manage vacations? Where do you like to go and what do you like to do? Any advice for folks on how to manage their homestead needs when they want to travel?
Lisa: Well, my husband and I haven’t been on a proper vacation in probably 20 years! We used to vacation in Maine each summer when we lived in Virginia, and we also had horses at that time, but were fortunate enough to find a horse sitter who came twice a day to feed the horses and turn them out. When we added the chickens and ducks, she also collected eggs and locked them up each evening. It can be hard to find someone to watch your animals though, and they never do it exactly the way you want things done, so it works out perfectly for us. We just moved to our favorite vacation destination. Since my husband was in the Navy for more than 25 years, he’s traveled all over the world and has no desire to go anywhere, and since I travel for work, I’ve had the opportunity to travel all these years all over the US and he’s home caring for the farm!
We do love to do day trips here in Maine – whether it’s to Bar Harbor to stroll around downtown a pop into various shops, or Camden for lunch on the water – there’s so much to explore an hour or two away and we can still be home to lock up the chickens! We did build a predator-proof, completely covered, Fort Knox chicken run that’s about 18×40 for our chickens and ducks. They have a dust bath, swing, benches, hanging treat baskets and all kinds of fun things to hop onto and nap under, so we feel safe leaving them in the run when we’re not home.
Q: Can you give us an inside sneak peek/ideas at what is coming up on your new series and what the audience can expect?
Lisa: For season two of Welcome to my Farm, I’ll be visiting a pumpkin farm, feeding donkeys, going to see a holiday light show, making a traditional New England Thanksgiving dinner and going ice fishing! And of course, sharing chicken keeping tips and some favorite treats with my flock. I’m really excited to see the finished episodes.
Q: Could you finish this sentence..” If I wasn’t living in Maine and living the life I currently lead I’d probably be living in —— doing ————
Lisa: Surprisingly enough, I would probably be living in Long Island running a bookstore. That’s what I did after I left Wall Street, before I got married, and it was my second favorite job I’ve had.
Q: When you were a kid what TV or Movies did you grow up watching and what were your favorites?
Lisa: I loved Bewitched. That was my favorite. I wanted to be Samantha when I grew up and be able to just wiggle my nose and have magic happen! My Mom and I used to watch Doris Day movies and all the old musicals too which I loved. When I was a little older, I loved Charlie’s Angels.
Q: Who is your favorite celebrity and why?
Lisa: Oooh, that’s a hard one. As far as men go, I would say Kevin Costner. I’ve had a crush on him from way back. But I think my favorite female celebrity has to be Ina Garten. She just seems so nice and down to earth. And I love her recipes.
Q: If you had the opportunity to meet someone and spend some time with them chatting who would it be? (Alive or passed)
Lisa: I admire Reese Witherspoon so much. She has had such a long career and done so many things. She’s such an inspiration. I think it would be fascinating to talk with her.
Q: If you had to make a 3-course meal for an intimidating group of chefs using your true farm to fork lifestyle – what would you make?
Lisa: Well, I prefer to call it “coop to kitchen,” but I think I would start with a good old-fashioned whiskey sour to get everyone loosened up a bit.
My twist is a Maple Sour which is a nice introduction to my Maine farm since it calls for maple syrup and an egg white foam.
I would definitely make a classic Caesar Salad with homemade dressing and garlic croutons for the starter. I share my favorite recipe in my cookbook, The Fresh Eggs Daily Cookbook (HarperCollins, 2022)
Q: When will this second season of “Welcome to My Farm” air and where?
Lisa: We plan to have season two begin airing July 1st on over 300 local public television stations across the country as well as on CreateTV and streaming on Passport.
If you haven’t viewed this hit series yet, then you are in for a treat. Its mix of down to earth helpful advice, cookery creations and insights into rural lifestyle experiences are an engaging mix of entertainment and practical knowledge. Lisa Steele is brilliant in her role as host, serving up delightful experiences you won’t want to miss. See it HERE!
People volunteer to help at horse and dog/cat rescue operations for a variety of reasons. The benefits of volunteer work is a two way street and benefits both the giver and receiver of the time and energy an individual puts into the activity.
Volunteer work can help address issues of the human condition such as loneliness and feelings of low self-esteem, it can build camaraderie and help folks to meet and make new friends with common interests.
Volunteers often participate in the care and nurture of animals to address their mental illnesses or provide physical activity to keep them on the move while providing a worthwhile lending hand.
Contributing to the realm of community spirit adds purpose to life. The volunteer base is the foundation of the operation for the horse, canine or other rescue organization. Keep reading to learn how to attract and retain volunteers!
How To Attract Volunteers
Hapless circumstances sometimes create opportunities that commandeer the attention of a volunteer and provide an open door to their hearts and potentially their help in some form. Some examples: The loss of a beloved pet may leave behind an emotional void for an animal lover; the replacement of a four-legged family member due to its demise may induce visits by a potential volunteer to a rescue where an affordable and life-sustaining action of adoption can provide a solution; forced retirement due to illness or injury or simple economics can leave free time for people used to active lives who seek to expand their horizons.
Whatever the reason people volunteer, everyone is grateful that they do. Selfless acts of kindness are few and far between, and as an organization depending on volunteer staff, attracting the right type of volunteer for a particular task can be tough.
Some folks offer their time and energy to help without seeking any reward at all, while others require more than just a quick Hello and off-hand pat on the back. A person may be great for one task at the rescue, but quite hopeless at another. Regardless of who the volunteer is at hand, treat them with respect and kindness. We all have our life journey and not everyone reveals their trials and tribulations openly.
Actively seeking volunteer help can be tricky, but there are some tried and tested methods.
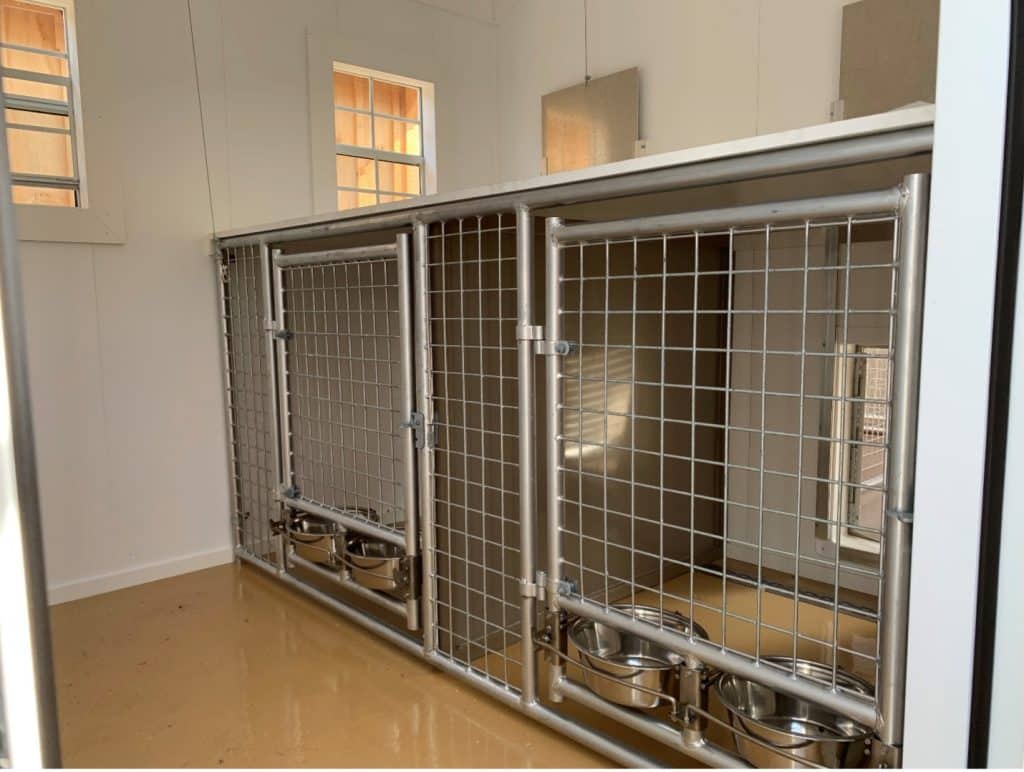
A key method to attract any volunteer is to provide a safe, secure, and well-organized environment that is clean and comfortable. Figuring out where an individual best fits jobwise can come later. The prime concern is to bring them to the facility and establish a good working relationship from the beginning.
For example, a modern commercial style kennel with hot and cold running water, plenty of indoor storage space for food and supplies, that offers heat/AC and safe, well designed kennel boxes with runs will make the daily care chores of the space easy to complete than an old-fashioned concrete kennel with low ceilings that is dark and uninviting.
Similarly, a horse rescue with broken down pasture fencing and bent gates with muddy entrances to paddocks and rutted dirt stall floors will not be either as safe or as enjoyable to work at daily as a facility with well-maintained paddocks, matted stalls, and a tidy yard.
Be Open. Be Honest.
Open House Days and fundraising events are a great place to start the hunt for help. Broadcasting news of your good works by encouraging the local press and even national press via social media to attend such events is a must. Provide as many opportunities as you can for folks to learn about your rescue via podcasts, You Tube videos and similar media. Don’t overlook the useful reach of your local newspapers and radio stations. These resources often offer free public service announcements (P.S.A.’s) to verified charity organizations.
Invite school administrators to bring their students to attend on site events and lay on hands-on critter petting activities, silent auctions, and other interest features such as showcases of professionals that are part of your team such as a vet doing a check up on a resident animal or a dog trainer putting basic commands into a puppy, to encourage a learning environment for all that attend. Make the day fun and as interactive as possible.
If you can attract a celebrity to any event, it is a boon to attendance. Given of course, that you spread word of their attendance widely beforehand.
You can also advertise for volunteer help needed but try and offer some incentive such as a free riding lesson at a horse rescue, or a discounted adoption price for volunteer workers. Social media platforms are the obvious choice of venue for ads to garner the most attention but make sure any sponsored ads are carefully placed for your immediate commutable region.
It is important to be open and honest upfront about your needs and requirements of the job you’d like the volunteer to do as well as the schedule and timeframe. Know which areas you have flexibility and which areas you cannot manage without a permanent solution.
Some examples: If you run a horse rescue and can take on volunteers that require the time needed to train them to handle horses and safely work around them that is fine, but if you need experienced horse folks then that is obviously different. It’s no good attracting an enthusiastic volunteer to work at your dog shelter if the noise of persistent barking from caged dogs’ winds them up.
On the other hand, if you need help at 7 a.m. on every weekend morning and the volunteer can only come on on/off weekends, then you may be able to work with the schedule by adding another volunteer.
How To Keep Volunteers
Providing appropriate and well-functioning tools, equipment, and supplies to complete the task at hand with the allowance of sufficient time to execute a chore or assignment are factors that empower folks to do a good job.
Convenient location of necessary services such as hot/cold water, easy snap fittings on hoses, good lighting and a heated/cooled space for work breaks are all essential aspects of good business management practices. Add in a secure safe place to park and a location where personal items/valuables can be secured during the workday for extra bonus points. A worker that is constantly worried about their ‘stuff’ and their personal safety is not a happy worker.
Keep the brief on the work to be completed clear and concise to avoid misunderstandings and mistakes. Outlining the job at hand without adding endless ‘buts’ and contingencies at the beginning can always be followed up with a more detailed review later once the volunteer has mastered the basics.
Many volunteers value not just handing out their nurturing skills and free hand to manual labor but also the education they can garner during the process. Teachable moments don’t just apply to children. Use opportunities that present themselves to help people learn skill sets they didn’t have before or know they possessed. This type of life enrichment and fulfillment may take more effort on your part to manage but will result in a loyal following.
Always set a good example with your own behavior. Show up on time, conduct yourself with grace and calm and be kind.
Is Managing a Volunteer Staff Really Different than Running a Staff on Payroll?
Rewarding your volunteer base on a regular basis is a ‘must do’ but these rewards do not have to be expensive or fancy undertakings such as throwing big parties or dishing out gifts. A rescue organization’s budget is tight enough to begin with and most volunteers would not wish to take any form of financial payment for their efforts. They would rather the funds go to help the animals in need.
Being flexible and understanding of a volunteer’s schedule and showing respect for the efforts the individual makes to complete a task is a good start to keeping the volunteer happy. Unlike a paid staff member, a volunteer obviously does not have to show up or be there on point, and as with any staff member showing appreciation for their work without undue criticism is a good jumping off point to building a great relationship.
It should go without saying that you should never berate a staff member of either type, paid or volunteer. Anger has no place in personnel management, and certainly any ‘talks’ should be done one on one in private, never in front of other staff or other people.
But in reality, there are not many differences in the best practices to manage a staff of either type. Regardless of whether the person gets a pay check or a pat on the back, the management skills to hire the right person for the job, engage them to reach their best potential and encourage loyalty to you and your business are much the same.
As most folks know, barn design should always incorporate fit and function as well as aesthetic appeal. But a factor that is often overlooked is that of how details of design can be mapped out to make life easier on both aging horse and human.
The passion for horses often lasts a lifetime, both yours and that of your equine partner. Old age creeps up on all of us – well at least those of us lucky enough. It certainly beats the alternative.
But along with growing older comes an almost inevitable plethora of challenges. Health and financial are two key arenas where the horse owner finds themselves increasingly mindful. For the horse age-related issues might not include the bank account, but health care of the vintage horse often requires special needs such as limited turn-out, dry lots and the like.
Here are some tips to help horse owners plan their barn designs for their senior lifestyle and that of their beloved equine family.
Stay Grounded
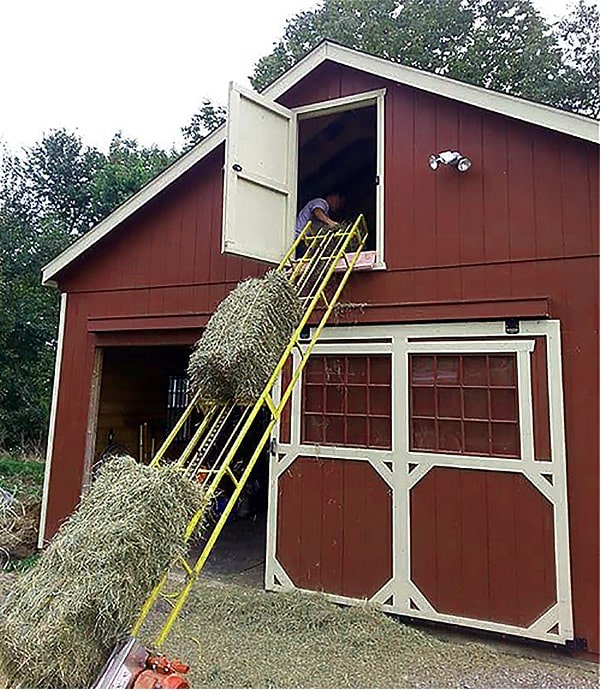
Groundwork takes on a different meaning as you grow older and complete tasks around the horse yard. When it comes time for heavy lifting of hay or other essential supplies to the barn loft or access to overhead storage areas, the wall ladder may become increasingly difficult to navigate.
Bending and lifting the hay hatches in the loft floor may be too strenuous a task to contemplate, and tack room cabinet handles and step ladders needed to clean windows may be too high to comfortably reach.
In the barn building plans consider the provision of a staircase with steps that are not too steep but meet regular building code requirements. The stairs need to be wide enough that if a vintage horse rider slips when descending the staircase their legs do not become entrapped in the railings or banister. A sturdy build with a hand railing on each side can add an additional layer of safety. Hay hatches may be fitted with hydraulic hardware to aid in lifting.
The initial barn design could include storage locations at ground level in extra stall spaces with a separate building located nearby for delivery and storage of the bulk of the hay supply rather than in a loft space.
The allotted space can be periodically resupplied with hay by others or movement/distribution of hay from a separate storage building can be made by vehicular means such a UTV or side-by-side unit.
The cabinets above counters in tack rooms can be placed to the lowest allowed location by building code, and hardware can be mounted across the base of the cabinets to allow easier reach.
Windows should be easy to operate from the ground without the need for a step ladder.
A caregiver that stays ‘grounded’ is less likely to be hurt or injured completing daily horse care tasks.
Gnarly Nifty Hacks
As we age, we generally become physically weaker and along with less strength conditions such as arthritis may haunt us too.
Barn doors that you once found slid open easily may now feel cumbersome. Latches on tack room cabinets or stable doors may be difficult to open due to arthritis.
When you build your barn consider the weight of the doors as well as how smoothly they open. For example: Instead of wood doors the use of metal doors may lighten the load.
Ensure the hardware throughout the barn including stall doors is large and well-finished enough to be simple to operate without the need for strength to combat spring loaded actions or the need to fiddle or grip tightly.
Minimize Maintenance and Maximize Access
The use of ladders to clear gutters or make rooftop repairs are just one of the hazards that increase in risk as we age up and almost inevitably our balance and strength is not what it once was – climbing ladders and clambering over roofs should not be on our ‘to do’ lists. Neither should heavy snow lifting by hand with shovels, putting together and utilizing scaffolding to reach chandeliers that need dusting in the aisle or siding that needs repainting or repair.
When designing the horse barn choose low maintenance on brand products with good warranties that are proven to minimize maintenance in the future.
Pathways from parking or house to the barn should be finished for the use of easy mechanical plowing methods such as snow throwers, and access areas to pastures and driveways kept free of obstacles and large enough that a snowplow can be brought in to remove snow if necessary.
Expensive options such as radiant heated exterior pathways and interior floors or heated tack rooms and office spaces, or fully heated barns and the like are all possibilities if the budget allows.
Temperature Swings
As age increases both horse and human find extreme temperature swings more difficult to cope with due to the physical challenges that heat and cold present.
This is for several reasons: Older aging horses and humans generally have less fat layer beneath their skin to keep them warm; metabolic rates decreases with age; chronic health issues make management of temperature fluctuations harder to manage such as heart conditions that are stressed by the need to pump more blood to the skin surface to cool the body.
In terms of barn design the addition of an insulated roof and walls, installation of commercial grade fans for cooling need, passive and mechanical ventilation such as cupolas and electric fans in cupolas are all areas where forethought can help mitigate issues with temperature control during extreme temperatures or errant temperature fluctuations.
Tasks Take Longer
Completing mucking out, watering, and grooming tasks may take longer as we age. Our safety while executing them may depend on how steady we are on our feet and how much time we can allow to take frequent breaks for a brief respite.
The inclusion of automatic watering systems can eliminate the need for lifting heavy buckets filled with water, but the mucking out task will always be part of the daily horse-keeping chores where stalls are provided.
Consider the benefits of the Dutch door on the exterior wall of each stall with an overhang for added shelter for the resident equine, with a center aisle barn design where the caregiver can stay out of the sun and rain the entire time horsekeeping duties are being completed.
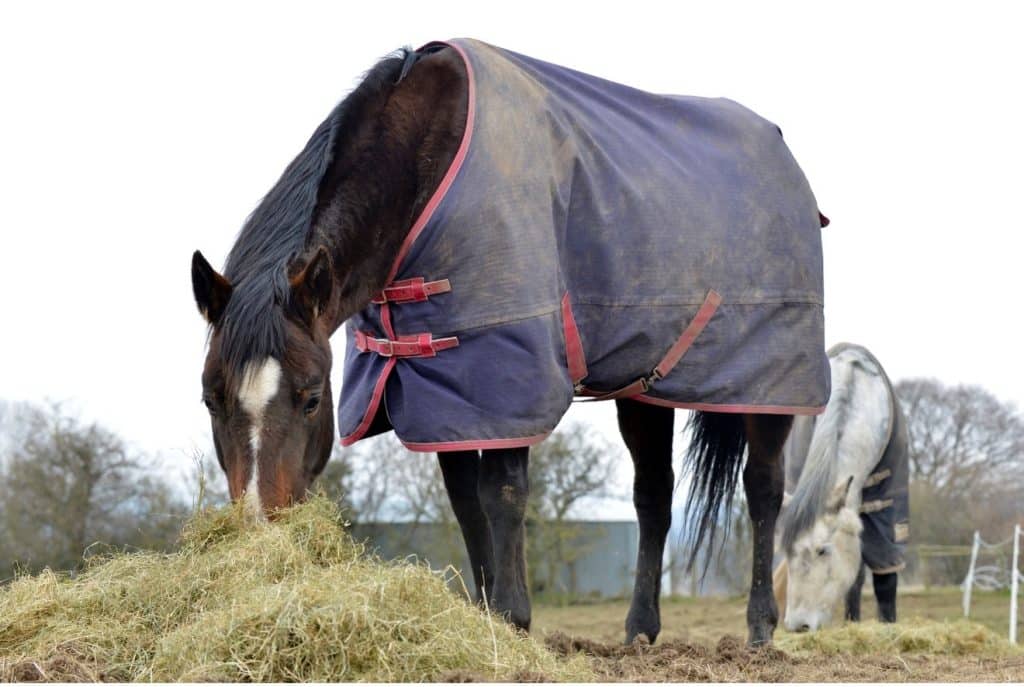
If each stall is designed with an adjacent outside paddock or dry lot area, the stabled horse can easily be let out each day or have free in/out access most of the time, allowing the caregiver maximum flexibility in feed times and mucking out routines. Hay might be provided in an equine feeder (a great way to save on hay wastage and hence hay expenses which is especially important for those on a fixed income).
This timeline flexibility is valuable for the horse owner who may then choose to complete barn work during the cooler or warmer periods of the day according to their preference. As we grow older, we all feel temperature extremes more acutely.
An added safety bonus of the exterior door set up, is that horses can be locked outside the barn while mucking out tasks are completed without their presence. Horses access to stalls can also be limited to minimize both the expenses of bedding and the amount of labor required to muck them out.
Stalls fitted with front stall wall hatches for hay and grain feeding can save the need to open a stall door at times when the horse is likely excited and negates the associated risk that a pushy equine takes advantage of the moment the door is opened to escape its confines.
The use of Dutch doors can also limit the amount of time and risks associated with handling horses for turnout. For the older vintage horse rider and equine caregiver, the necessity to bring horses in and out of pastures especially where snow or ice conditions exist is a high-risk event. And for the older horses that are not as lithe and limber as they were in their youth, the need to navigate long distances with poor footing can be minimized.
Consider The Horse Of Course
Just as people develop diseases such as Type 2 Diabetes and other metabolic disorders, nerve diseases, sight, or hearing loss etc. horses are also likely to suffer the consequences of illness and infirmity of the aging process.
Freedom of movement with in/out stable access can mitigate arthritis issues and a dry lot or limited pasture arrangement can help with issues such as PPID/Insulin Resistance and Cushing’s disease.
The installation of rubber mats in stalls can also improve the comfort for horses with laminitis prone feet or arthritic joints and save costs on bedding.
A separate ‘Jenny Craig’ dry paddock that is well fenced and readily available for special use during any laminitis flare up or weight management need is a useful space on any horse property. Placing it close to the barn can help keep the horse quieter and allow it to feel more secure, while also limiting the distance that the horse and handler are required to navigate to go to and from the barn. It can also be used as a quarantine space in times of need.
Keeping a horse suffering loss of sight in a smaller area without a change of location can help it cope with its condition.
Site Your Barn In Sight
While it is important to visit and check horses out in person daily there are times when the caregiver is temporally less mobile due to minor injury, recovery from surgery or rehabilitation from strokes or other issues.
Placement of the barn within sight of the house with its exterior stall doors facing house windows can ease the stress of the horse owner that is forced to leave the daily horse care tasks to others.
The ability to be able to see the horses happily engaged following their routines and standing on all four feet behaving normally from the house, can also relieve stress for the equine owner and release them from the urgent need to go out to the barn to check on their charges.
Add Layers Of Security
Implementing driveway alarms, video monitoring devices and motion detecting security lights can help any horse owner maintain better security of their horse farm and monitor the comings and goings on the property.
A multi-pronged approach with a mix of hardwired, solar powered units and remote systems is a good way to maximize coverage, with some units clearly evident and some hidden.
Security is particularly important for the elderly as they are more at risk due to the infirmities of old age that may include hearing loss. Devices that vibrate or work on batteries that can be placed close by the individual when ensconced in the house watching TV so they can be heard, can help reduce stress associated with unexpected company and put people with nefarious intent off visiting the property.
No horse farm owner wants to play around with fire. Sadly, every year horses and humans die in fires, and property and equipment is damaged or destroyed. A farm is a high-risk environment for fires, but simple routines and proactive measures can mitigate that risk. Many times devastating fire events could have been avoided.
Advice on fire safety practices on the horse farm will often encompass areas of common concern such as moisture content of hay and its storage, provision of evacuation plans and emergency services contact numbers, 24/7 illuminated exit signs, smoke alarms, fire extinguishers, removal of cobwebs from light fixtures, no smoking signs, keeping the barn aisle free of obstacles and all wiring protected from vermin and the reach of inquisitive equine noses.
While putting all the above advice into action is a must, there are other fire ‘starters’ that are often overlooked. For example, did you know that arcing of batteries in equipment such as tractors is a leading cause of farm fires? Electrical arcs can reach 10,000 degrees Fahrenheit.
Why are buildings in the farm environment are generally considered at higher risk of fire than a residence?
This is because where animals are houses the humidity is generally high and there are certain gases present in the atmosphere such as ammonia and hydrogen sulphate that are corrosive. When electric current is applied in a barn, either on a piece of equipment or through the electric wiring circuit servicing the building’s needs, they are thus subject to the negative corrosive forces of this environment. Extra safety steps can make all the difference in mitigating the level of fire risk.
Here are some helpful farm safety practices and protocols that you may want to add to your fire prevention list.
Remove batteries from equipment when storing it for long periods of time. Especially tractors and larger vehicles. Store batteries in a warm, dry location away from cold temperatures to extend battery life.
Empty the hay baler of all hay before putting it away in a building. Hay that sweats up in the baler not only causes paint damage and rust to the machine it also presents a fire hazard.
Avoid plugging motorized equipment into outlets in the barn or hay storage area. Some examples: electric charged golf carts, diesel engines that require block heaters to be plugged in for cold winter starts.
Be careful where holiday decorations are placed to avoid locations of a flammable nature such hay storage areas, dry wood walls, or areas of likely cobwebs and insect/vermin issues. Ensure that the quality of the wires is UL graded for exterior use. A barn may be thought of as an interior space but usually the humidity caused by the livestock housed within combined with the fact most barns are unheated spaces creates condensation and moisture and is considered an exterior environment from the electrical standpoint.
Unplug small appliances such as coffee makers, microwave ovens and toasters when not in use. Horse equipment such as plug in hay steamers should always be carefully monitored to ensure they are not dry of water as a fire may result. Ideally these units should not be left plugged in without supervision.
Ensure all outlets are fitted with GFCI for additional protection of users of electrical circuits. Install AFCI where recommended by a licensed electrician. Although annoyingly sensitive to electric current fluctuations AFCI installation can readily detect issues in the circuit before a fire ensues.
Ensure all breakers and circuits are up to electrical code requirements and breaker box is easily accessible and do not overload circuits. A breaker switching off automatically is your warning that the circuit is not functioning safely.
A quick Electric 101 course: As mentioned above barns and farm buildings are at higher risk of fire than homes due to the housing of livestock and humidity and corrosive gases produced by the presence of animals. Corrosion of copper and brass in wire can produce a localized heat that may eventually result in spontaneous ignition of surrounding materials. Corrosion and rodent damage can also leave wires exposed that may cause arcing/ sparking when an electrical current is applied, setting on fire flammable components nearby.
Extension wires that service tank water heaters and electric fences should be protected from damage from snow plowing equipment and heavy tractor tires. Avoid placing electrical extension wires anywhere a shod horse’s foot could impact it or trip over it. Cover of temporary use extension wires with rubber mats to avoid the tripping hazard is common, but these should be periodically checked to ensure there is no damage or wear to the wire beneath and this method should not be considered a permanent solution to an electrical outlet need closer to the area of use. Consider solar powered options for power where possible e.g. fence chargers.
Steel fire doors versus wood, should be installed in offices/bathrooms/tack rooms etc. The addition of automatic door closures can provide another layer of protection for areas at high risk for fire such as feed rooms and barn kitchens/offices. The automatic door closer will help prevent vermin from finding their way inside these spaces and save the need for opening and closing doors by hand when often your hands are full of buckets or tack and equipment.
Never use any open flame in a building. This may seem obvious but sadly rocket heaters stuck at the end of an aisleway, or kerosene heaters in feed rooms and the use of generators in the interior of a building are all too often utilized by farm owners resulting in fire.
Lightning is more likely to strike a taller building than a diminutive neighbor, and farm structures are often much taller than other buildings on the property. It is a myth that metal buildings are more likely to be struck by lightning than wood buildings, but it is a good idea to seek professional advice regarding grounding rods and lighting protection for tall buildings in exposed locations. Removal of large trees that may be struck by lightning and fall on the roof of a farm building should be considered as an additional preventative measure.
Transformers atop telegraph poles that transfer power from one circuit to another on the street should not be located close to structures on the property as they are at more risk of being struck by lightning than poles without transformers. Consult your electric power company for advice. Requests for transformers be moved and sited distant from the barn if they are currently close by are usually honored without cost to the property owner.
In regions at high fire risk the common cause of fire is hot embers igniting roofs and surrounding brush or shrubs around the perimeter of the buildings. Choosing a fire-resistant roof material when building the barn can help mitigate the fire risk. Removing shrubs and debris, trees, and other flammable materials from the immediate area of the horse barn can help alleviate the fire risk further. If viable add a high-power water source nearby the building that can be utilized in case of the need to wash down the structure during a fire event to help defray the ember ignition risk. A swimming pool can make a handy water source option if the right attachments are installed at the pump in case of need.
Ensure that your property is well lit and easy to find during nighttime hours. Driveway lights at gates and clear and illuminated signage detailing your street number and farm name can save valuable time for the fire department if called out to your property in an emergency.
While accidents can happen taking safety precautions seriously is a solution to minimize the risk of fire. Don’t forget to keep your driveway and access to the barn clear of snow and easily accessible for emergency equipment too and your street address well signed at the roadside to ensure your property is easy to locate.
One of your best resources for advice is your local fire department. Invite their staff over to inspect your premises and offer suggestions for improving your fire safety practices. Perhaps at the same time offer their team a lesson in safe handling of horses, and don’t forget the monetary donation if they are a volunteer unit.
If you are in the planning stages of constructing a new barn, it is prudent to address the fire risk concerns during the initial phases to make daily use of the structure as safe as possible. While every contingency cannot be covered as future needs may not be known, adding extra exterior and interior properly installed outlets and designing special storage areas for flammable equipment and supplies is something you’ll never regret.
Such measures can also save you money on insurance costs each year. For example, fiberglass shingles on a roof rate better than asphalt in fire safety so premiums may be lower for the former, while metal roofs may be rated lower than shingle roofs from an insurance perspective.
There are many factors to consider when you embark on your garden design project. The shape and topography of the property itself will help guide you in the initial backyard layout process but budget constraints will likely ultimately determine the final picture. Above all the primary function of the space should stay the primary focus as you put pen to paper or finger to touch screen.
You don’t have to have a college degree in landscape architecture to make good design decisions for your own backyard. Transforming your current garden into an additional ‘room’ for the pleasures of outdoor living and entertaining invites creative spirits to go wild, but there are a few simple considerations that are best mapped out at the beginning. Check out these outdoor layout ideas before you begin designing.
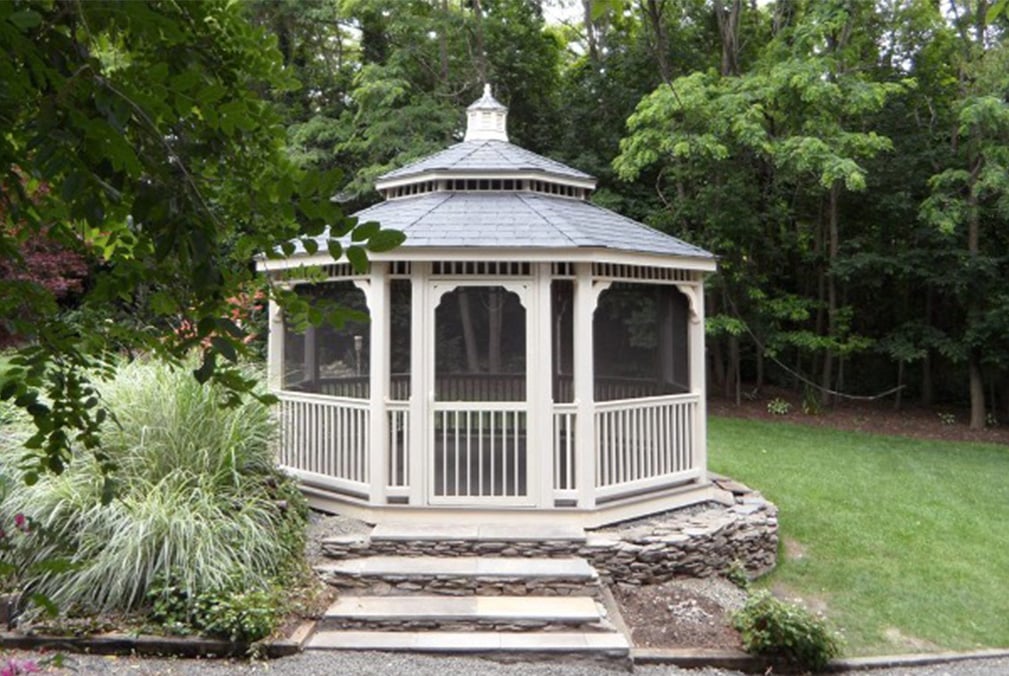
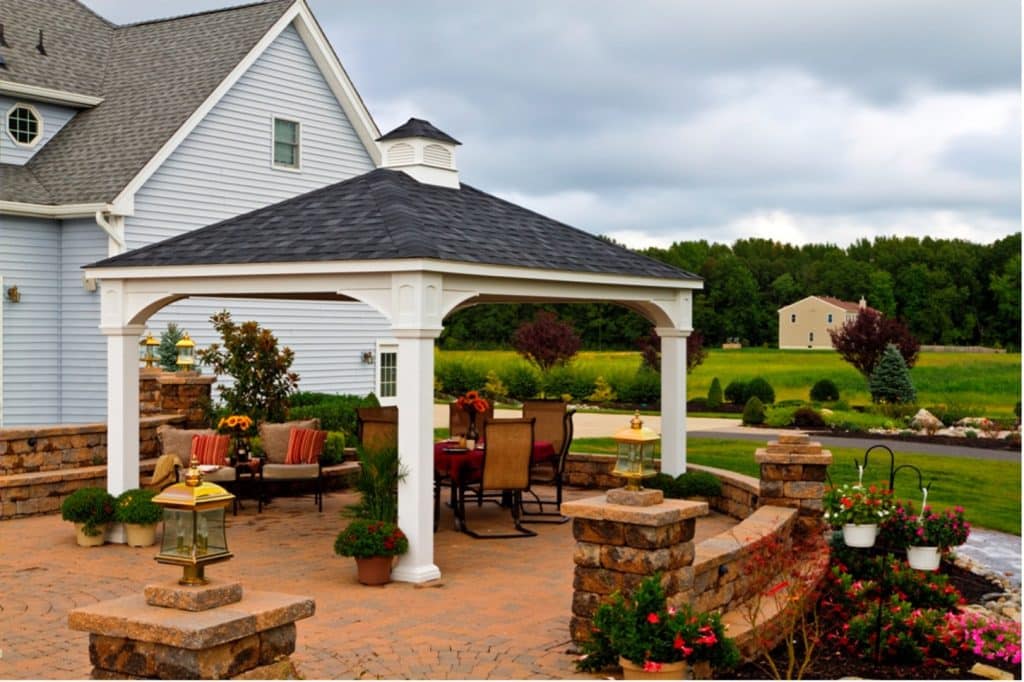
Type of Outdoor Living Structure and Topography
Gazebos were traditionally placed to allow occupants to ‘gaze’ across the bounty of their garden views during Victorian times. This necessarily meant siting the structure on a rise or at least a few feet above the surrounding garden. Maximizing the 360-degree view from a gazebo is a great idea in theory, but in today’s more crowded urban environments the privacy advantage the gazebo offers over its cousins the pavilion and pergola may be lost if it were placed in a higher elevation.
For this reason, the gazebo may be better placed against a backdrop of woodland, privacy fence or at the end of the garden, or centrally located in the backyard as a focal point with a minimal raised site where discreet plantings can be made to screen the structure from unwanted glances from neighbors.
The pavilion or pergola structure offer the advantage of being adaptable for gathering of various sizes, and their placement should consider their impact of perspectives in size as well as situation away from areas of extremely high winds. For example, a pavilion or pergola set alongside a house would look odd if its height exceeded that of the eaves of the house.
Consider the view of the structure from the windows of the house. Depending on the function and use of the structure it may be preferred to be in full view from a regularly used window or it may be obscured from sight to provide a separate private space.
Patio Or Deck?
The topography of your backyard layout will also affect your options between incorporating a deck or patio in your design.
Where there is a drop or rise in gradient, building decks with different level platforms is more straightforward than putting in the necessary foundation work to support stonework.
Sonotubes or concrete pillars can easily be placed to offer the required support for decked areas and stairs are easy to construct. Decks are also generally cheaper to build than stone patios.
Bear in mind that some type of fencing of the area may be required to meet building code safety protocols if the area is more than 9 inches above ground level. An elevated stone hard landscaping area would also require walls or fencing. A foundation or ‘form’ may be necessary to support the weight of a wall to avert freeze and thaw actions and to prevent settling of the wall.
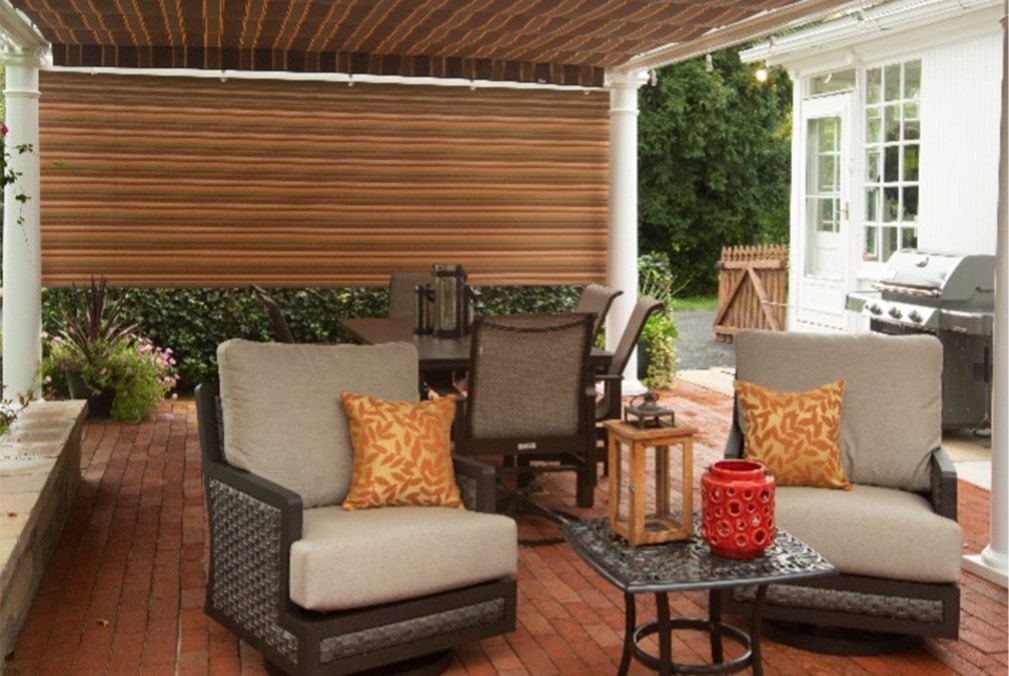
Gating the patio or deck in addition to fencing can provide an exterior space where your dog or young children can safely play and exercise. The addition of a covered space adjacent to the house such as a pavilion, with direct access from the home, will extend your usable living space with easy access for supervision of the antics of kids and pets.
A significant advantage of a wall over a fence (unless it is a solid fence construction), is the protection it offers from the wind for both people and plantings.
For flat areas stone or masonry work, rubber bricks or poured concrete all offer good options for creation of a mud-free environment that a grass ground cover would inevitably incur.
It is a good idea to have an easy access method from the patio or deck to the garden area and to the house. A ramp is stroller and wheelchair friendly. Being able to access the patio or deck from the garden rather than just through the house allows more privacy when entertaining as people can enter the yard without trudging through your home.
How Do You Get There
Inviting winding paths that twist and turn provide additional room for bedding plants to be viewed and discovered en route. A direct path makes access straightforward and draws the eye to the structure making it a focal point.
Wherever the paths lead you consider the pros and cons of how you finish their surfaces and how distant to the house you locate the structure. A gravel path may look attractive but be hard to navigate with a wheelchair or food trolley and a long route to and from an outdoor living structure means long food treks with trays full of dishes and drinkware.
Service Access for Water and Electric
Accessibility of services is often overlooked initially as the addition of electric, water or other options such as Wifi are often considered easier to implement than they actually are and the need may not be immediately apparent.
Once you start using the outdoor living space being able to decorate the area with lights, water container plants without dragging hoses around the garden and browse the internet or add security features requiring Wifi or electric may all become wanted to enhance the ease and enjoyment of the space.
Good planning will ensure better placement of outlets and faucets/plumbing lines for functional use and provide the opportunity to hide or bury cables and pipes.
The Critter Factor
The annoying presence of rodents, destruction of expensive plantings by deer, or damage by flying squirrels/raccoons or insects should all be incorporated into the design of the garden space.
Screens for gazebos, shade E-Z covers for either/both the sides and roof of a pergola, can help deter the activity of buzzing insects and pesky bugs. Thoughtful design in the actual structure should avoid any nesting area pockets or shelves for birds to set up residence and elimination of hornets/wasps/carpenter bees should be undertaken immediately their unwanted activity is noticed. A simple Carpenter Bee Trap is a good idea around wooden structures of any type.
Deer and rabbits love to dine on the ardent gardeners’ plantings and keeping them out of the backyard can be problematic without creating a negative effect on the space by confining it with high fences and brick walls. Eco-friendly solutions in warmer months include attachment of hoses to special motion sensors that scare of the critters by spraying them with water. Other alternatives include electric fencing or other wire type protection.
There are many solutions published online. Determining which will work for your unique situation may take research and some diligent application.
Soft Landscaping Patterns and Palette
Mixing vegetable with flowers and shrubs in the garden planting arrangement has been widely utilized as a method to defray damage from bugs and insects to all plants and can create a vibrant all-season color palette to the garden. For example, the planting of marigolds at the lawn edge can mitigate the intrusion of insects and nibbling critters to vegetables planted behind them. Ornamental cabbages and kales will add color to the garden all winter long, and bulbs planted in DIY chicken wire cages set beneath the surface of the soil can mitigate the destruction of the vulnerable bulbs by voles and mice before they have a chance to flower in the Spring and Summer months.
While blue colors in plantings give a feeling of distance and space, the warmer reds and oranges create a feeling of proximity. Consult a color wheel for useful advice on not just what plant heights and textures and shapes to place where, but also what colors to choose to create the identity and impression you want to create around your outdoor living structure.
Children and pets are particularly hard on garden plantings. Certain plants can also be dangerous for the inquisitive youth and playful pet either due to their toxicity or their thorns and prickles. When planting always consider not just the zone and sun/shade location of the plant, but also whether the plant is safe for all users of the garden. Regardless of whether you have pets or children of your own, you do expect the plants to last. Your garden legacy should be kind and safe for those that may come behind you.
Development of your dream horse farm project from scratch is a creative endeavor and requires many skills and talents of the person in charge of the enterprise.
Every creative project needs a showrunner. Even in the ultimate arena of creativity, the media world, the familiar decision-making positions in the TV and film industry such as Directors and Producers are actually below the Showrunner in the pecking order.
The showrunner has ultimate creative authority and management over a program. In the case of developing a new horse farm from blank landscape to finished facility, this person could be you.
The cast of characters that need to be assembled to complete the creative concept in the case of the horse farm project will not be writers, actors, directors, craft services or trailer and transport companies, set designers, soundstage managers, or hair and make-up specialists.
The cast ensemble will likely be bankers, insurance companies, architects, engineers, personnel at various roles in the town building department, excavation and site specialists, carpenters, material manufacturers and retailers of building supplies, delivery drivers, service providers such as local power and water companies, and all manner of folks in ancillary roles from portable potty providers to fencing companies and everything in-between.
A great deal of collaboration is needed to successfully complete the building of a horse farm. Cooperation from all participating parties on both their quality and accuracy of craftsmanship as well as on the executed timeline is essential or the production will not be completed on schedule. As the showrunner, changes issued to the script once the ‘readings’ have started will cost time and money. Keeping the whole project on budget is also the role of the showrunner.
Sounds intimidating right? It certainly can be. It helps if everyone involved knows their job and if they have worked happily together before but that is often not possible.
Horse owners are generally considered a ‘picky lot’ by everyone from hay farmers to veterinarians to tack and equipment manufacturers. We want everything our way and generally communicate our needs in a direct manner and are very specific in our demands. Let’s just admit it. We are not shy to speak up.
This can translate well to the task of being the showrunner. Horse owners are often used to supervising others whether they be two or four legged, are often very visually oriented and know how they want things to look, and commonly are up for more education and learning opportunities and have good communication skills.
If you have the time and energy to put into running the entire new horse farm building project from start to finish it can be an enjoyable experience but do expect to deal with bumps along the trail in the process. One key to success is keeping everyone and everything well-organized.
A timeline of events should be clear cut but there will be a need for some flexibility in the timeline due to delays caused by poor weather, supply of materials and delivery times and of course the human element in the equation.
For example, if wet weather delays the pouring of concrete components despite the site being ready, the construction crew may suspend your slot for being on site and you may have to wait while they head elsewhere to start and finish another project before they arrive. This knock-on effect on the delays caused to painters, roofers, and others including the site excavation team needed to return to backfill the barn aprons/finish parking areas and driveways etc., can be frustrating.
Obviously the earlier in the project you hit a speedbump, the more folks down the line will be impacted. However earnest and organized you are as showrunner, back up plans are not easy to formulate for every contingency and there may be times when work is sloppy, or plans are not followed.
Once you have orchestrated the ‘order of go’ and assembled the team that will encompass all the players on the field that will execute the project, the timeline will be sincerely affected by planning permission and permit issuance. Remember that these permissions may not just relate to the structures to be built on site, they may also apply to septic system designs, driveways, service access for utility companies etc.
The Planning Board is called ‘planning’ for a reason. It may be an oxymoron to suggest you ‘plan ahead’, because all plans are obviously made ahead of time hence the use of the word but do utilize as much advance notice as possible to all parties involved in the dream horse farm project. This will help minimize disappointments down the road and mitigate the change of snafus disrupting the project’s progress.
As you complete your project plans and timeline look for smart ways to manage the risks along the way. Risk assessment is an invaluable tool in any project management. Some examples: large deliveries can be complex in their content and thus monitoring their accuracy against the order placed can take time and be subject to errors; inadvertent property damage may occur with repeated use of driveways/access points that may incur additional expenses to rectify.
Solving such issues can be simpler than you might at first suppose. Choosing a modular horse barn option does make life easier than a site-built pole or stick built structure. You will enjoy the advantage of a ‘to the penny’ quote so cost overruns won’t be a factor and the plans needed for permits can be readily provided (and amended if necessary), at a relatively low cost versus hiring architects and engineers directly as the show runner. Daily liaison required for the structural build is minimized as the modular construction company will take care of all those details with their dedicated team and there will be no delays in production of the barn caused by poor weather.
As a showrunner for a construction project, you may not have experience as a ‘GC’ or general contractor and know what players to call in on what schedule or have the resources to know who is a reputable painter, a good roofing company or even what products are best suited for purpose to use in the build.
When it comes to barn design features and styles, collaboration with other more experienced ‘writers’ in the horse farm arena can be helpful. You can always edit the ideas brought to the table.
The reason the title showrunner was coined in the first place was because there were so many people listed on shows and films as executive producers and producers/directors, it was hard to know who was in charge and who the studio executives should liaise with to call the shots.
As the obvious choice for ‘showrunner’ of your own horse property development project, you will ultimately be responsible to pay all the bills, answer to any shortcomings in the construction of the facility with authorities and live with any negative results of its design.
Collaboration in any creative endeavor is a key to success. Cutting down the huge variety of characters in the cast you must work with on a day-to-day basis and utilizing experienced help to garner best construction practices, materials and craftsmanship makes a lot of sense.
Enjoy being the showrunner on set, just be smart about who you choose to work with and how you plan to stay on budget, so stress is minimized, and the expensive capital purchase is a pleasurable experience.
How do you make a smart decision in any situation? The first task is to gather information. Research and due diligence will make all the difference in the decision-making process and will help you manage expectations in a realistic manner.
Being open-minded at the outset will keep more options available for you and thus bring more choices to the table. Consultation with experts in each particular field of construction can offer innovative solutions to potential problems. A thorough review of every company, product, and prospective party involved in the horse farm project will help you determine the best selection for your individual needs.
Even with word-of-mouth referrals there is always room for errors to occur. You will need to supervise the daily work and its progress, liaise with various parties involved and monitor the accuracy and quality of work completed at each stage of the construction.
Don’t be afraid to speak up and have any necessary changes made during the process before the next ‘layer’ or stage is added. It is very difficult and sometimes not possible to go back, and remedy mistakes made in early stages.
Expect your job as the ‘showrunner’ to be full of decision-making, diligence, and diplomacy. The task can be rewarding and the final result of a stunning horse farm you can enjoy for years to come that is executed to meet your original vision will give much enjoyment. But you’ll need to keep your head up and eye on the road ahead, hands on the reins and legs tapping lightly from the saddle to enjoy the ride.
When you are responsible for the care of animals in your own backyard it is inevitable that vacations and extended stays away from home become complex to plan and execute successfully.
Whatever critters you care for, canines, chickens, horses, or other livestock, finding a reliable and trustworthy animal sitter to manage your menagerie can be a challenge. Here are some quick tips to get you started with ideas and resources to help you catch that plane, enjoy that beach or simply spend time away from the daily grind.
Do What’s Comfortable
One of the easiest ways to accomplish care for your animals while you are away, is to employ someone to ‘farm sit’ by living on your property in your absence to take care of chores.
Issues may arise if the party you choose abuses the privilege by causing damage or loss. This might be actions such as throwing parties, bringing other pets in your home that may or may not get along with your cats or dogs, invading your privacy by gaining access to or using areas of the home you have set off limits, nosing about in your personal stuff or even leaving premises unlocked and unsecured.
If you are not 100 percent happy that the person(s) you have available are trustworthy and will follow your clear directives and honor your wishes, then don’t do what doesn’t make you feel comfortable. Sadly, even relatives can break the bond of trust.
Start your hunt for help with people you know best, rather than the rest.
Research and Resources
Finding a kennel or farm sitter via social media recommendations can be a viable option for sourcing help, but be smart and don’t openly post the what, where, and when. If you limit access to your post to immediate family and friends, rather than an open call, you are less likely to find yourself the target of nefarious persons will ill intent.
There are professional companies and associations in many areas of the country that offer specific services for farm and kennel sitting (rather than those that are primarily aimed at regular residential house-sitting needs such as feeding the cat and watering the plants). Regular organizations such as the North Carolina based Pet-Sitting International, and there are more you can find on the internet based more specifically to farming and livestock through organizations like the National Young Farmers Coalition.
Resource your local Farm Bureau and Department of Agriculture Extension Office for job postings and advice.
These ‘professional’ organizations theoretically ensure the sitter has appropriate liability insurance coverage, and some of them background check while others do not.
Whoever you choose and wherever you find them, be diligent and do your own research including a full background check on the individual before you have over keys and access to your property.
All too often these checks are completed after the party has been employed. Similarly, don’t assume a neighbor, or horsey friend you don’t know well, should be exempt from you checking them out. You may be surprised at what you learn.
A clear contract of employment as an independent contractor should be executed that defines all aspects of the job responsibilities including timetable and fees. This is a business transaction and should be regarded as such.
If you discover something you don’t like or doesn’t sit well with you then pass on that animal sitter. It simply isn’t worth the stress that will surely follow later as you 2nd guess your decision to hire them.
Security Monitoring Systems
With solar powered alarm services, motion detectors, cameras, and video options readily available for purchase online, it is simple to add these important layers of security to your property. Hardwired or wireless, it is a good idea to do a mix of types of systems so if one fails or is unplugged/cut or discovered the others remain unimpaired.
Identifying the property as surveilled can help deter thieves and offers the additional benefit of keeping prospective sitters on schedule.
Please remember that unless those entering the premises are informed via signage or by written employment contract that they are being surveilled you may not be able to use such raw footage as collected as evidence in certain states in court.
Limiting Access
Talking of access, it is a good idea to limit the access to just the caregiver, as this person you have background checked and met, they have signed a contract and thus are a party in the business transaction. Even more importantly, they will have received your directives in person as to how and when you want specific animal care duties executed.
If you allow the sitter to bring their kids or pets or others along for visits, you are also exponentially increasing your liability for their welfare. Kids and dogs are notorious at finding mischief to entertain themselves especially in new places. Children clambering about on your hay wagons may seem like a giggle until someone falls off, and dogs unused to livestock can quickly give chase to a horse or run between their legs and cause upset resulting in injury to one or both parties.
The Daily Check-In
With the availability of smart phones, requesting your ‘sitter’ send you a video at each visit showing your animals on screen is a super way to ensure a) the caregiver is on site b) the animals are well. As the owner of the animals, you will quickly notice if a critter is looking unwell.
Emergencies Happen
Realistically the chances of a mishap or accident occurring on your property with your animals is higher when you are away than when you are present. Statistically speaking, the change in routine or variance in attention the animals receive and the use of motorized equipment or other tools by those less familiar with their quirks and nuances, translates to a higher probability of damage or injury.
Ensure that emergency numbers for all services including EMS, fire and police, plus veterinary surgeons/clinics, farrier, hospitals, as well as service providers of electricity and water, are readily visible and available with relevant account numbers if needed. Evacuation plans should also be posted as well as transport options for your animals.
Many property owners forget to include their own details of itinerary leaving only emails and cell phone numbers for contact. If your farm sitter knows your flight has landed safely or can check in with you at the hotel if your cell phone is lost or not working, then you minimize the risk of not being able to be contacted in an emergency.
Leave someone listed as in charge to make any serious decisions should you not be reachable. And don’t forget to ask their permission and give them your directives beforehand.
A first aid kit for horses and humans should be easily accessible, and it’s a good idea to add a few extras before you go. For example: a paste tube of Banamine or bute etc. This ‘emergency fare’ can then be used under the direction of the vet if necessary.
Leave spare supplies of fencing repair materials and tools that might be needed for common repair issues. Keep such supplies in a secured location.
Be Crystal Clear
Often because we know what we mean we assume that others do too. As a temporary caregiver it is overwhelming to receive a barrage of special instructions on a 20-minute visit and be expected to remember all the varietal facets of the instructions.
Write your directives down and make them crystal clear. Simple, clear, and concise language is a must. Don’t be tempted to add in a lot of ‘what ifs’ that confuse the issue.
Have a Plan B
Last minute issues do arise that preclude the designated sitter from attending as planned. Whether these issues are real or imagined, the reality is your vacation plans will be subject to interruption if you have not thought out a Plan B. A common reason a sitter might not be able to attend is their illness, or a transport issue.
A good back up plan can be to have two parties ready for action and have the second party ‘attend’ unofficially as a backup check on the first.
Be clear about the duties of the primary party to all, and don’t let party B interfere.
Your second party might be a family member that lives a bit far away to come every day but could stop in periodically. Keep the 2nd party schedule private from the 1st to maintain the element of surprise.
Relax
All this seems a lot. But it helps ensure that once you hit the driveway you’ll be more likely to relax knowing you haven’t left anything to chance.
It is important to get some time away from the daily routines for mental and physical health, and even a short trip away for a few days break can refresh our spirits and provide a new outlook on things at home.
Sourcing good quality hay is a hay quandary that has many horse owners pulling their hair out. Once a good hay source is located it is held as a closely guarded secret to be shared only among a limited necessary few, in order that the supply may be protected for their present or future needs.
As a seasoned organic horse hay producer, my personal experiences run the gamut from dealing with huge hay purchasers that don’t produce hay themselves, but act as middlemen to supply the market, to small backyard horse keepers who simply want a few hundred bales to last a NE winter. They all have one thing in common, worries about supply of good quality hay.
The recent dry weather across many regions of the U.S.A. and Canada has added significant weight to the concern. Even in our wet mountain microclimate in the Catskill Mountains of New York, this summer has been the first time in 24 years of hay production that 2nd cut looks non-existent due to scorched fields.
What is a horse owner to do? Here are a few tips to help manage the hay supply.
Management of Scorched Hay Fields
Many horse owners are used to bringing in their own hay or having their properties custom farmed and taking in payment some of the cut. When the fields are dry, the correct management of the hay fields is critical to protect next year’s yield.
Resist the urge to mow or cut hayfields that are showing weakness in plant growth and lack of yield unless the crop is alfalfa and is evidently dying off to such a degree that it will not recover. On grass hayfields even a minimal amount of leaf cover or stubble can still help protect the soil and root structure and nutrients of the grasses and legumes. After it has hopefully rained, the hay growth may improve slightly but likely still not enough to facilitate taking a worthwhile amount of crop for the cost of machine time in labor and fuel.
If weeds are gaining control in the hayfields due to drought, taking a high cut mow before the weeds go to seed can help mitigate their ability to take hold.
Instead take actions now to plan and protect the hay fields from winter damage from heaving, by leaving some crop on the field. Have the soil tested in Fall for nutrient levels and fertilize as needed. Lime, phosphorus, and other fertilizers applied now can help the plantings and seedlings weather the forthcoming winter season variances and encourage a better yield next year.
Take steps to secure an alternate hay supply for the season. Consider the following alternatives to regular dry hay bales.
Hay Extenders, Stretchers and Forage Replacers
Wondrously there is no definition or commonality to the above terms for hay/forage products on the market. This can lead to much confusion and errors in how such products are used. It is essential that consumers – well OK not the horse but the horse owner, read the label.
Be aware that some products are not made from chewing satisfaction long hay stems at all, they are made entirely of complete feed with a heavy bias toward including beet pulp. Some products may include actual hay to replace 50% of a horse’s hay diet and require grain be additionally fed, some 75% etc.
Consult with your vet before making major changes to your horse’s diet by making a switch to such products and as always, make any changes slowly.
Stretching the Hay Supply and The Dollar
Clearly less hay availability means higher prices will need to be paid for any hay sourced. This extra cost can be mitigated by the use of an equine hay feeder when hay is fed outside. Savings can be as high as 30%.
If you own an older horse or an equine that requires alfalfa hay but needs it chopped into chewable size pieces, you can save money by buying a woodchipper/shredder machine from your local hardware or big box store and chopping it yourself. By buying alfalfa in a bale versus a bag already chopped, you will save money. Simple drop the flakes of hay into the machine and out it comes finely chopped.
Many horse owners opt to have their hay supply delivered and stacked. This necessarily saves work but also incurs an additional cost.
Picking up your own hay direct from the producer can save you money on transport and labor and knock out the middleman making money or dealing hay. It also enables you to buy a more consistent hay product, and you will know firsthand the provenance of your hay. As many horse owners also own horse trailers, the transport of hay in the horse trailer is a good option. The closed trailer is actually a better transport option than an open trailer, where loads need to be tied down which takes extra time and effort and subjects the load to spray from wet roads or rain.
If you do not possess a horse trailer, renting a box van or contracting a moving company can also work to solve the transport issue. And you won’t need that gym membership! Moving hay keeps you fit.
Lesser quality hay may be purchased and then possibly improved by removing mold and dust using a hay steamer. Take care not to leave the unit plugged in without the necessary supply of water or an electrical fire may result. Soaking hay is an arduous process to do by hand and results in messy stall beds with wet shavings unless some form of containment is used at feeding time. Investment in a hay steamer can resolve this issue.
Take Home Message
Given the climate considerations and number of U.S. farms going out of business it is unlikely that the hay supply issue will ease as time progresses. Limiting the number of horses you own is a drastic way to reduce the use of hay and the hay budget each year. But it is something many horse owners will likely face unless they make compromises either in hay quality, amount fed, or have a healthy large budget and can afford to pay the increasing costs.
Boarding barns are already in crisis as to what to do, and some are posting on their social platforms that they will not be feeding hay in the fields to horses on daily turnout throughout the winter months.
Consider planting drought resistant hay grasses if you have the property, the budget for equipment and skill set to use it and could make your own good quality hay. It may help improve yield in future dry years.
Other methods that are being utilized to deal with the water shortage issue is construction of reservoir systems for water storage.
We’re all in this together. As a hay producer I can tell you that myself and my farming colleagues are doing what we can to best manage our resources and keep the grass growing.
The old grey whiskered Labrador, Conrad, viewed his new house mate, one year old terrier Jasper with mild interest from the corner of his eye as he rested his old bones and lay flat out on the living room carpet. Their owner had just left the abode and he heard her car rattle to life outside and begin to roll down the gravel driveway.
After some difficulty Jasper had clawed his way up onto the new couch, across the microsuede cushion and stood with his front feet on the back of the soft furnishing. He feverishly barked at the vehicle as it disappeared and leapt from one side of the couch to the other to gain a better view.
This routine was repeated every morning. And Conrad, weary from the incessant noise, slowly pulled his arthritic self to his feet and padded into the kitchen to have a drink of water. Unfortunately, Jasper had been there before him and most of the water was splashed over the vinyl floor. The stainless-steel water bowl was tipped on its side. The feed bowls where the two dogs had argued over breakfast earlier had rolled into the living room and little bits of remaining kibbles were scattered on the floor. Conrad sauntered over to eat them.
Jasper turned around to see his older roommate’s plan and jumped off the couch to help in the clean-up, and narrowly missed the lamp on the glass side table. For several minutes the dogs argued over the meagre food supply on the carpet. Jasper hanging off the other dog’s neck and attempting to bite his buddy with his baby gnashers. Conrad impatiently snapped at the younger dog in frustration. It was time to put the young rascal in his place. Jasper yelped as he felt the quick sting of teeth bite down on his floppy ear.
Suitably chastised Jasper ran off to hide under the couch. He had grown a few inches taller and was fatter than a few weeks before, and the underneath of the new couch was not as spacious in its cave-like quality as the previous one. Undeterred he pushed himself beneath it, where he quickly became stuck. Conrad meantime had disappeared up the stairs for some peace and quiet. His young companion still had difficulty navigating the staircase so it was the one way he could avoid the endless taunting from playful Jasper.
After several minutes struggle, Jasper managed to turn himself sideways under the couch. Thanks to his antics some black fabric hung from the ceiling of his cave, so he chewed it to see what it was about. As he did so it started to rip further, and with great satisfaction he pulled on it more aggressively. He found himself free from his pinned position as the fabric teared even further and exposed the belly of the beast above him. Delighted he backed out of his cave with the fabric still in his mouth. After much pulling and biting, he managed to detach a large piece of material which he promptly sat down to chew.
Half an hour later Jasper was not feeling so good. He had ingested bits of the fabric and gagged as he tried to regurgitate that which did not sit well in his tummy.
After some effort as he paced around the living room, he managed to evacuate the content of his stomach that included both bits of fabric and the morning breakfast he had bolted down earlier. He felt much better. He trotted across the room to the kitchen without regard for avoiding the mini piles of detritus he had strewn across the carpet. Consequently, the kitchen floor was soon decorated with his paw prints floor painting.
Bored with no Conrad to rag on, Jasper nosed about the kitchen cabinets and under the table. An errant bit of onion, a garlic clove wrapper that had fallen on the floor by the garbage bin attracted his attention. Further investigation revealed a few other tasty bits behind the bin as he pushed it around the floor with his nose. As he reached behind it and pushed forward, the bin toppled over and lo and behold, a bevy of interesting contents spilled forth as its lid flipped open.
A few more hours of play with the contents elapsed before Jasper realized the mistake of his adventures. His digestive system in uproar, he felt the need to pee. So, like the good dog he was he headed to the pee pad his owner had left by the back door to discharge the contents of his full bladder.
Satisfied with his success peeing on the lovely smelling pee pad, he adventured around the kitchen to see what else he could find. He was distracted by a knock at the door. Jasper ran to the door barking his loudest, a bit afraid of the noise without his buddy Conrad’s presence.
Conrad was asleep upstairs on his owner’s bed. He heard the disturbance downstairs and lifted his head to listen. But the knocking stopped so he yawned and went back to some shut eye.
Life was very tiring these days for Conrad. He knew it would be hours before his owner returned and he would be able to get out and do his business. It was becoming harder and harder for him to hold it in for such long hours, and fistulas had developed making his bathroom duties even harder to accomplish.
As with many Labradors, his kidneys were not handling the aging process well, and he had frequent urges to pee that had to go unaddressed. His owner had limited his access to water at one point, to try and save the unfortunate accidents that occasionally happened despite his best efforts to hold it.
Meantime downstairs Jasper, frustrated by not being able to see the visitor through the door, had leapt up on the couch again to look out the window. The man climbed into his large brown truck and drove off. Jasper continued to bark. He hoped the visitor would return.
As the young dog looked through the window, he spied a lady walking a large German Shepherd on the narrow path in front of the house. This set of raucous noise from Jasper, and the big dog startled and looked toward the house as it heard it. Then it too began barking and dragged its owner over the front lawn, the long leash extending quickly. Soon its handler was forced to let go of the leash as she was in danger of falling over, and the large plastic reel bounced along behind the bounding German Shepherd as it came right up to the front window. It plowed across the garden full of flowers, the leash ripped through the peony plants that dropped their fragile petals as the dog carved his route to visit Jasper.
For a split-second Jasper thought the big dog was coming in the room and leapt around in a crazy manner. He jumped down from the couch in a panic and knocked over the large lamp on the side table and ran back and forth from living room to kitchen.
The big dog’s owner retrieved their beast and after some admonishment from the human to the canine, the two retreated back over the lawn.
Conrad lifted his head again to listen to this new level of barking noise. He slowly raised his old limbs to stand and then cautiously jumped down off the bed and headed down to the hallway. It had been hard to get on the bed, but it was the only space he could find to lie down that gave relief from the pain of his arthritis.
Jasper meantime fraught with panic, had pooped in several places around the house downstairs. Conrad carefully picked his way around the mess as he discovered the latest calamity that Jasper had caused.
A few hours later Jasper had calmed down from all the excitement although still felt stressed. Luckily, he had discovered a box of children’s toys and he had found chewing on them made him feel decidedly better.
He especially liked the ones that made a squeak or noise, and was determined as all terriers are, to fix that noise once and for all. Killer instinct had kicked in and Jasper had successfully bitten into a large ball that had deflated and after more work given up its contents of a large plastic object.
Conrad looked around the room with mild interest. He sniffed at a few objects most of which he was familiar with, but his interest was piqued by a long-haired doll he hadn’t seen before. As soon as Jasper saw Conrad pick up the doll to carry it carefully in his mouth to a corner where he could investigate it further, he attacked the older dog’s new toy and hung off the doll’s hair as Conrad attempted to lift it higher and out of reach. Soon both dogs were rolling around on the dirty floor pulling the doll between them in a tug of war. Conrad won. Jasper skulked off eventually in defeat. Both dogs’ coats not as clean as they began.
The owner returned home an hour later than usual due to demands of the day at work that had gone awry. Conrad dashed through the door to relieve himself delighted that his owner had finally appeared. Jasper quickly followed him. He scuttled past his owner and did not regard her commands (that soon became cries) for him to go to her. Instead, he scampered off across the front lawn remembering the large dog and keen to see where it had disappeared.
It was another half an hour before the owner managed to catch Jasper. She noted the wound on his ear and the damage to the flower garden. She wondered what had happened to cause her kind old Lab to bite the smaller dog and was also upset that her beautiful blooming array of peonies so carefully tended by her were in disarray.
Once back at the house she saw the state of her home. Utter dismay lit her face, followed by a look of anger, followed by a look of disbelief. She had left the dogs alone many times before and while little accidents had happened nothing as major as the mess she encountered had ever occurred.
The owner sought advice of a dog trainer on how she should manage two dogs and handle the canine behavior issues and looked online for suggestions. Crating the dogs was a common suggestion but she just couldn’t bring herself to confine her old dog to a small box for long periods where he could not move about at all, and she felt crating just the young dog would be unfair.
Another suggestion was she should purchase a two-dog kennel where the canines could comfortably be housed with an inside/outside option, their own space and a securely fenced covered run.
To her amazement purchasing the kennel was simple. After a brief chat with a prefab kennel building company staffer to answer questions that followed her finding just what she wanted on their website, a to-the-penny quote was in her hand and delivery was set for the following week. On their advice she had purchased a kennel with features she knew both her dogs would love.
For the older dog the ability to come and go inside and out would relieve his anxiety and physical stress at having to hold his pee and poop for long periods when she wasn’t home. The ill-advised method of withholding free access to water for Conrad would be avoided.
As each box could be built to different sizes, she had selected a kennel that offered just that, based on advice from the company staffer as to what size would be best for each dog to be the most comfortable. Too small and it would be restrictive and too large, and the animal would not feel secure.
There would no longer be arguments about food or water supplies and there would be no spillage of either, as each box had stainless steel bowls secured to the interior kennel box door that were simple to remove for washing and filling. She could also now ensure the older dog had his special diet food and that the younger one could be fed the puppy chow he needed.
Conrad would no longer be harassed all day by the antics of the young Jasper, and there would be plenty of companionship without fights and arguments.
The two-dog kennel was tall enough that she could easily stand inside and had a small wire mesh door that she could keep closed when the main door was open to prevent any canine escapes. There was even a lobby space for the dog food and perhaps a small sink later if she wanted to add it.
The floors were not too smooth to cause a problem for Conrad getting up and down or slipping but were smooth enough for easy care. The drains were neatly set at the back of the boxes and protected with stainless steel, so that clean-up was easy, and the dogs were not lying over drains.
For Conrad, there was enough room to add a raised dog bed in his box where he could comfortably rest his weary joints without the pressure points caused by hard floors with the added bonus Jasper would not be able to access it to destroy it.
For Jasper, he would similarly have the freedom he needed from interference from the other dog but would be able to go in and out as he liked to the secure covered pen outside that was decked with durable Trex boards. The owner planned to place the kennel in the back garden away from the road and passers-by, where the dogs would be free from interaction with visitors that might set them off barking.
A few weeks later, the kennel all safely in place and ready for immediate use with a hassle-free delivery by a strange ‘mule’ like machine that easily navigated the route to the back garden, the two dogs contentedly lay on their respective decks facing the house. The owner was late home again, but it didn’t matter. Life was calm and happy now.
There had been a vet visit necessary for Jasper following his ingestion of questionable object and upset tummy for several days from the incidents that fateful day, but thankfully the foreign object discovered by X-ray has passed through the dog without the need for surgery as the vet had suggested it would.
The owner found cleaning the kennel easy to accomplish, and much easier than cleaning up the messes in the house. Everything was so well designed. And now she didn’t drive extra fast trying to get home or turn down offers to socialize with colleagues after work on occasions.
It was a win-win decision for everyone. And the owner knew she would enjoy utilizing the kennel for many years to come. It had already been useful to house the dogs when her sister and toddlers came to visit, and their over-excitement threatened to derail the holiday celebrations. In fact, it almost seemed as if the dogs preferred to forgo the crowded house on such occasions.

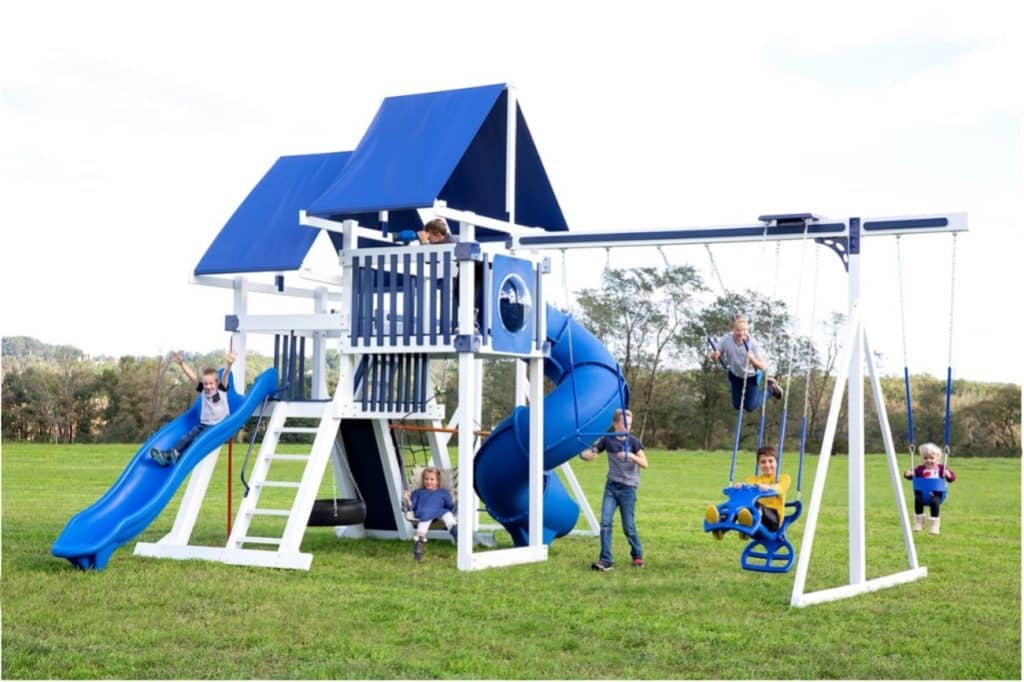
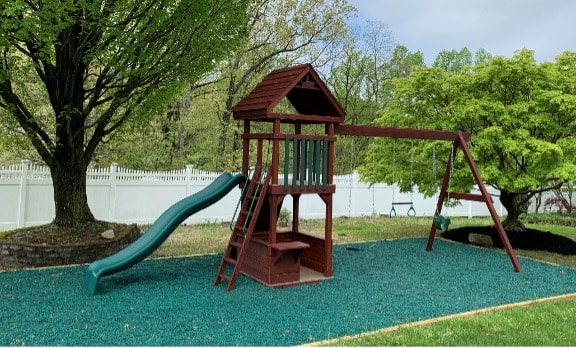
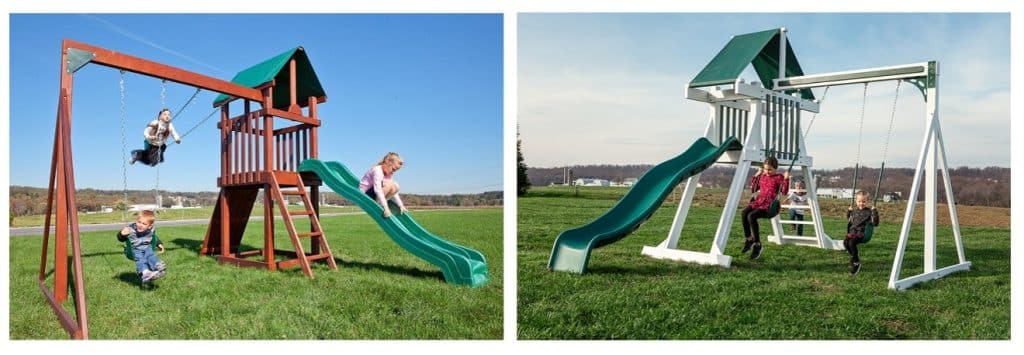

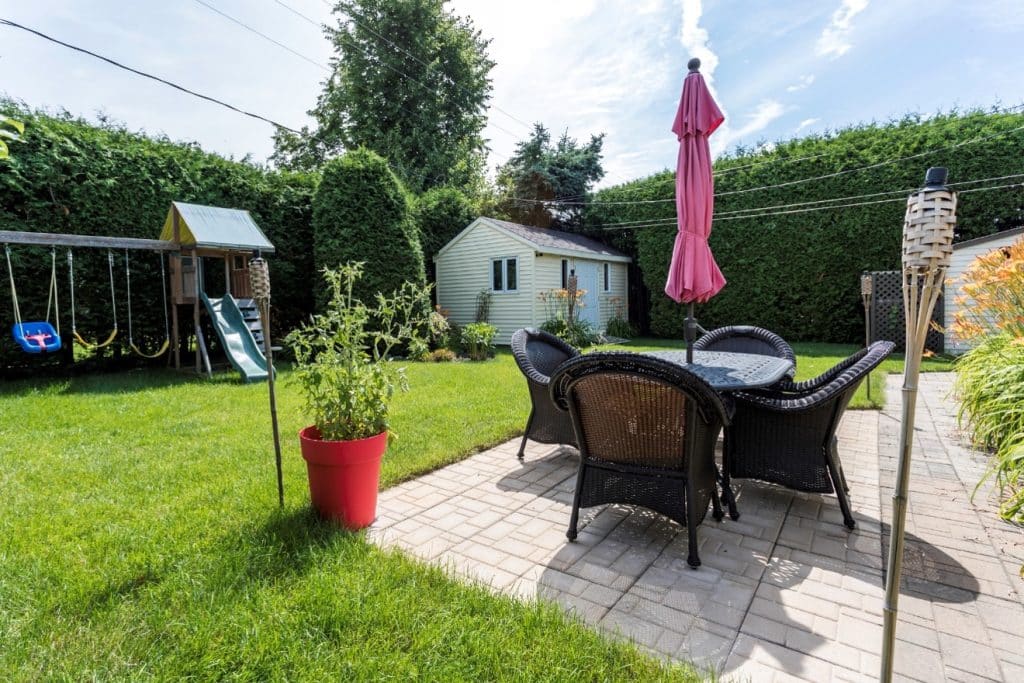


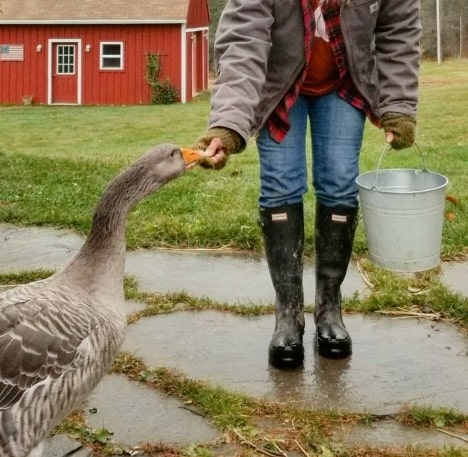


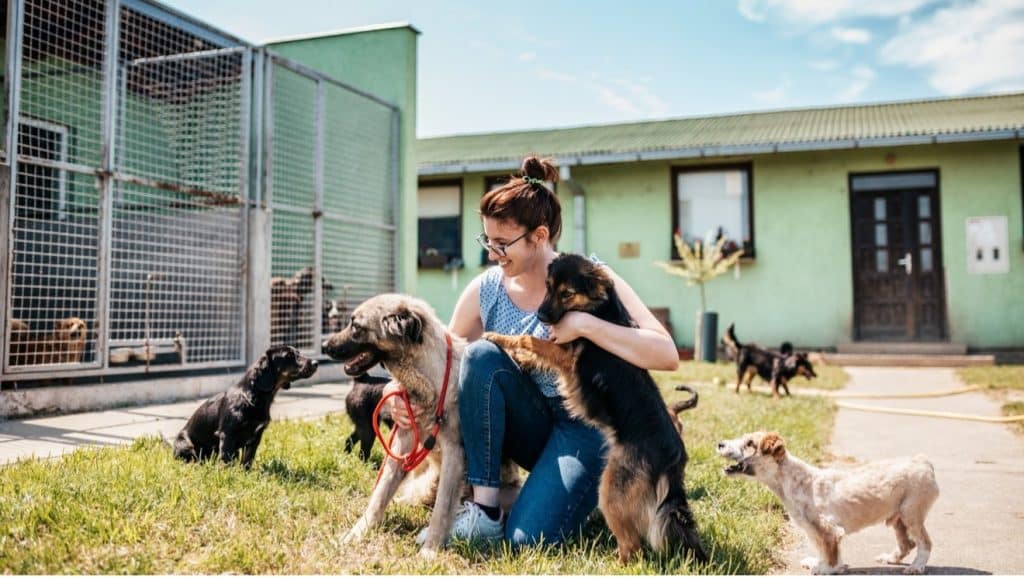

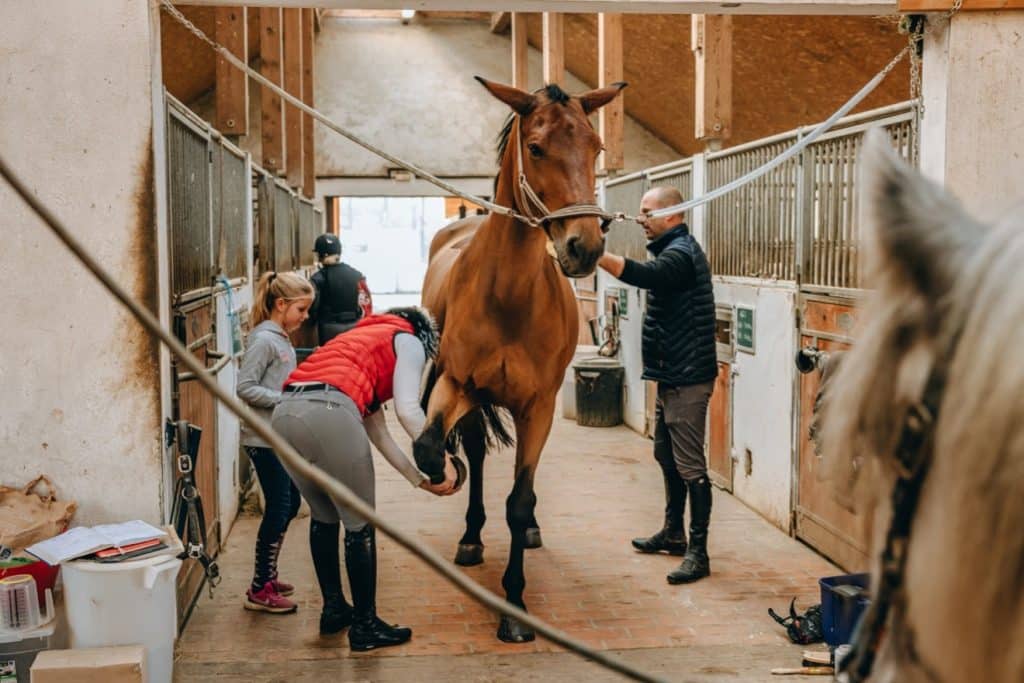
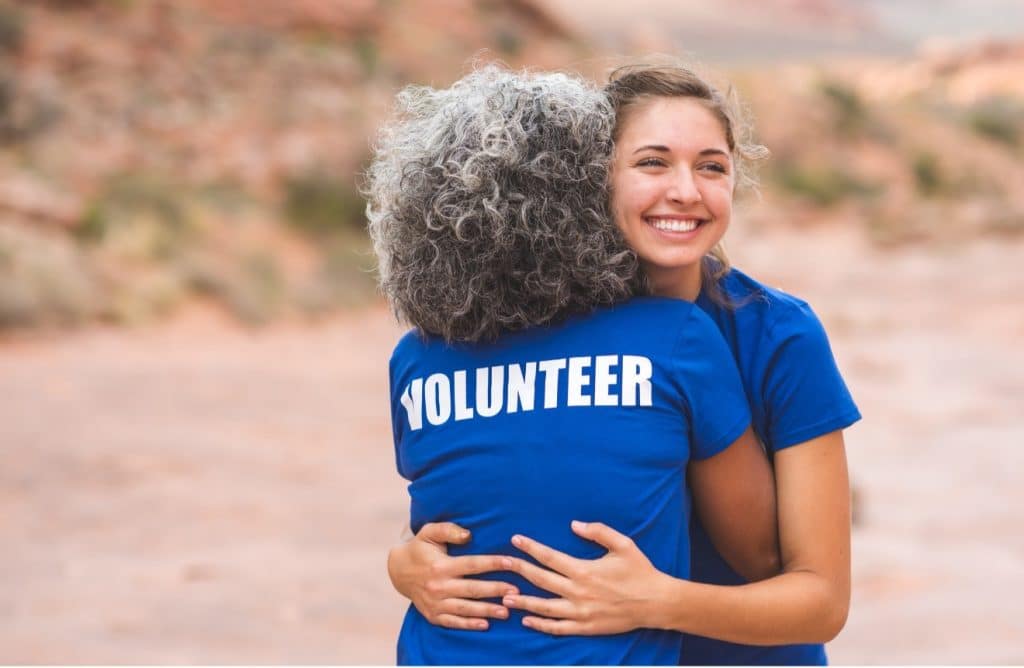

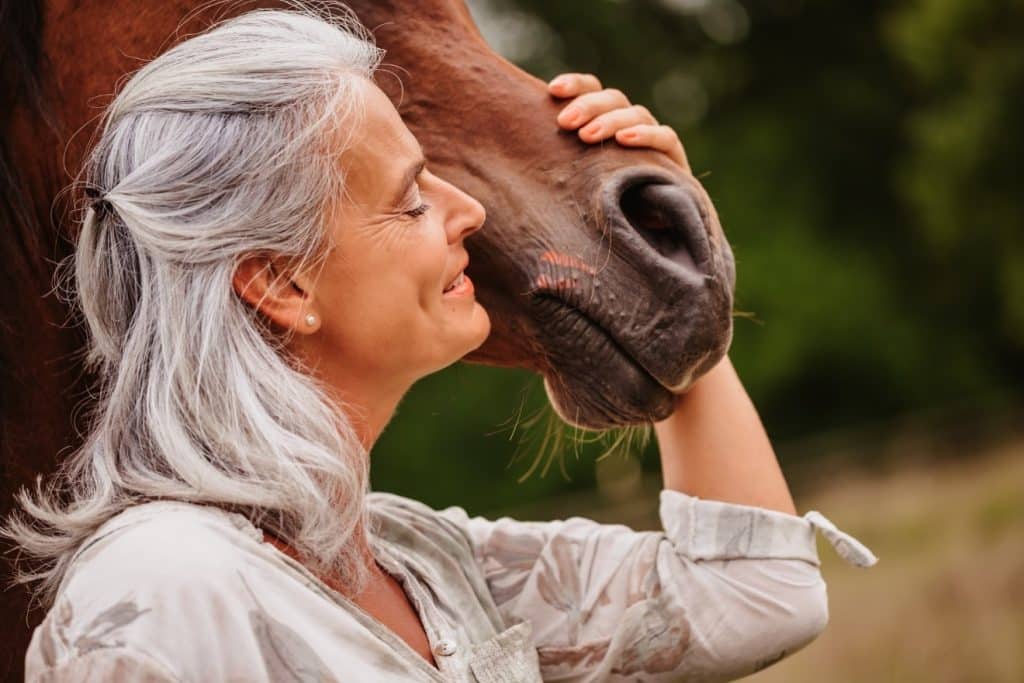
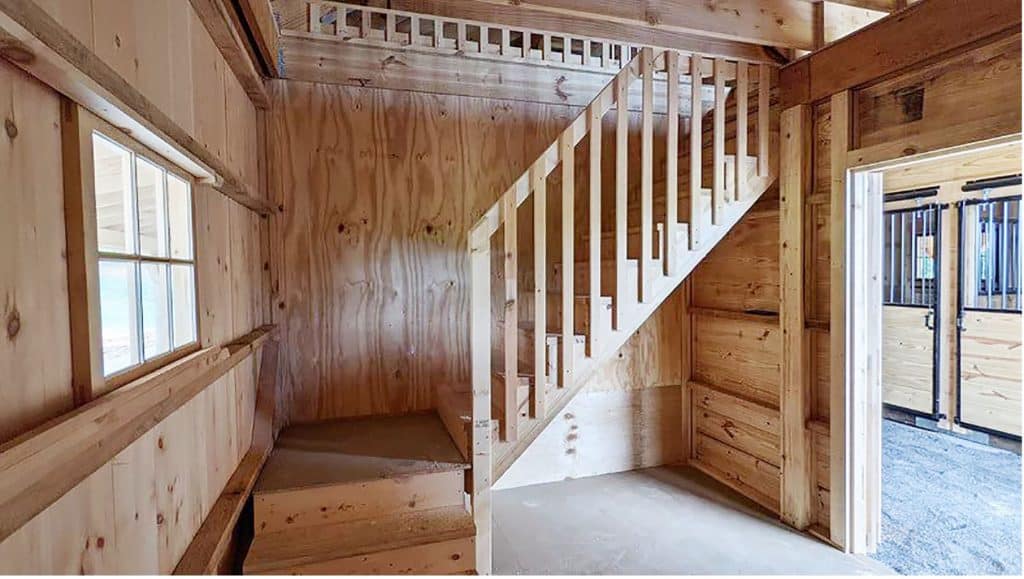
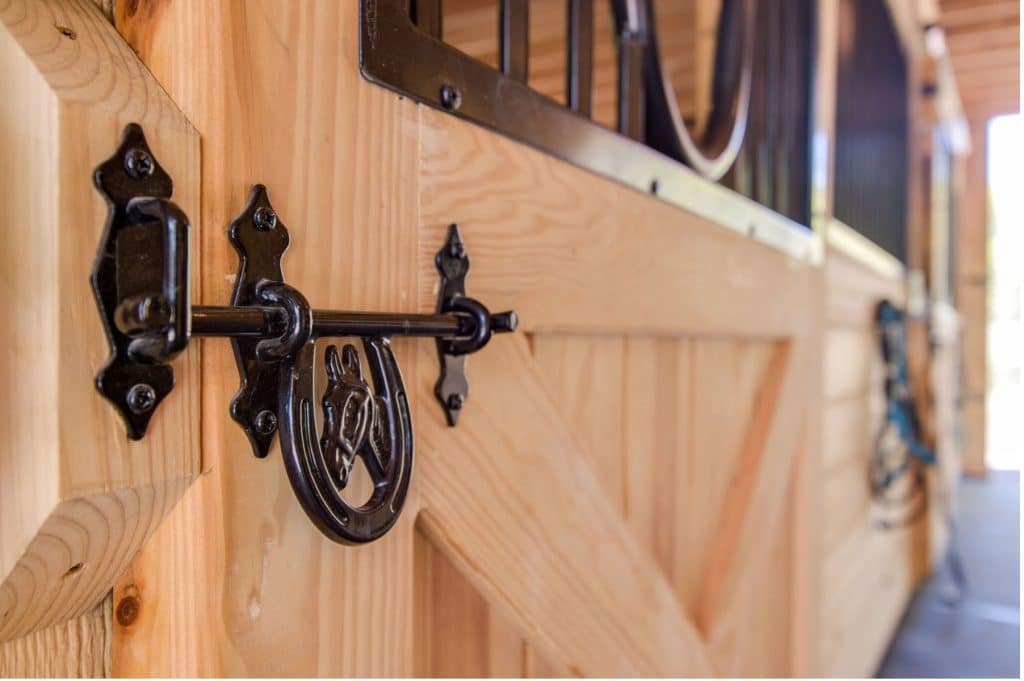
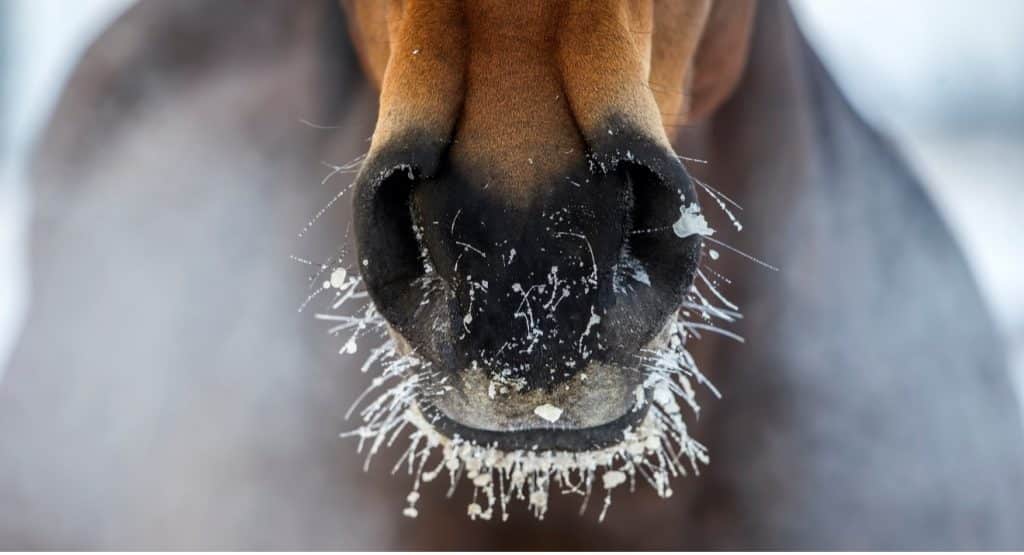
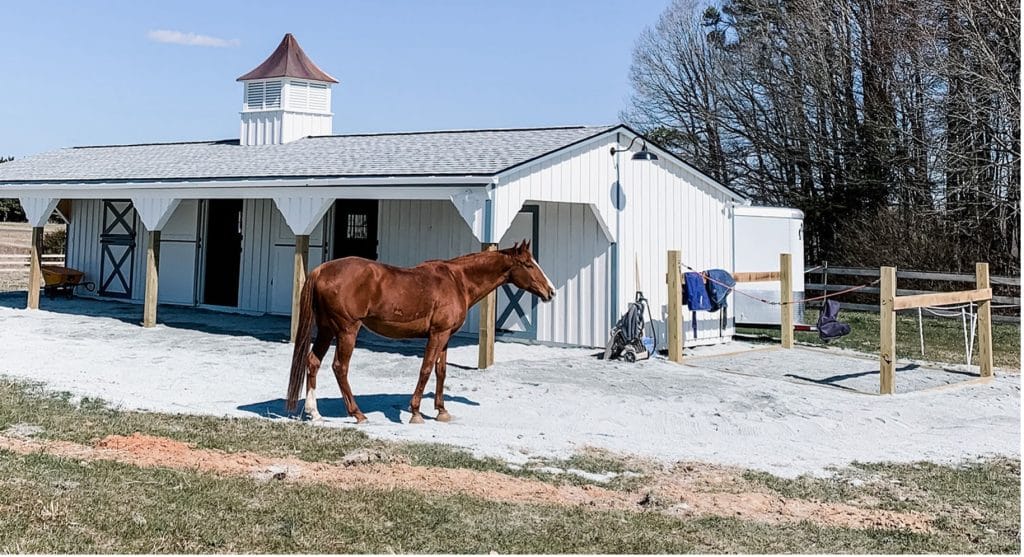
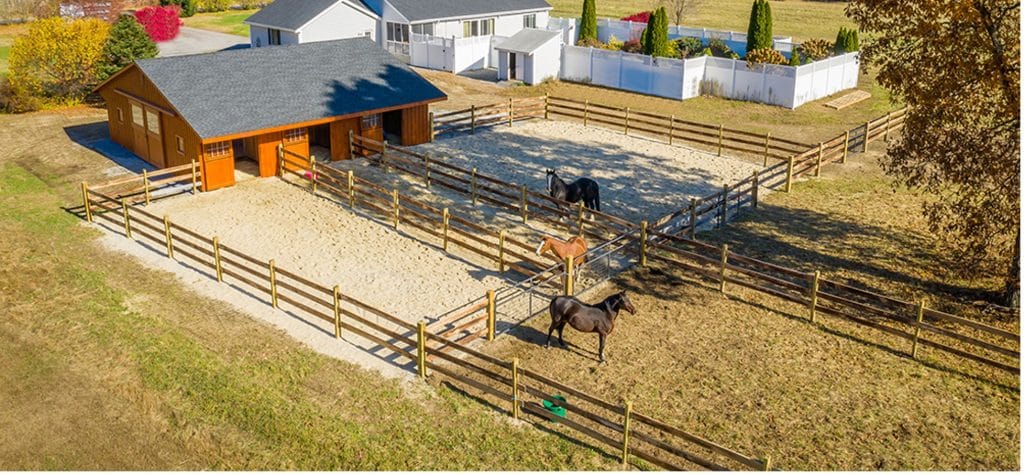
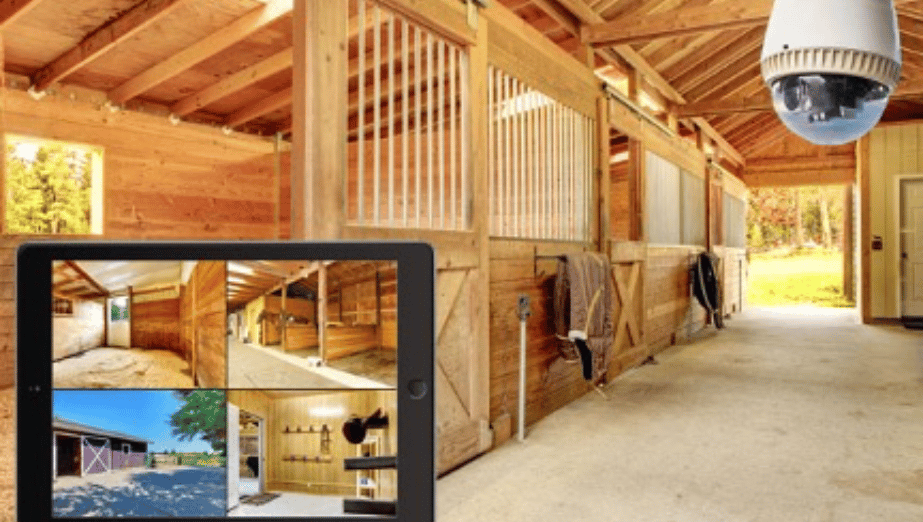
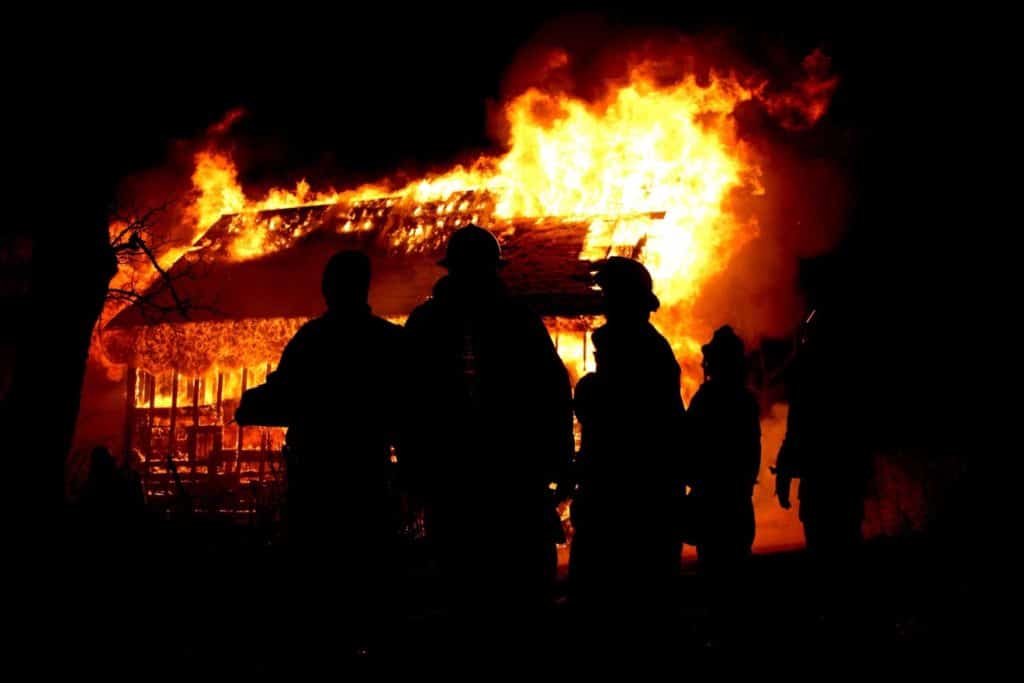
 A quick Electric 101 course: